Editing Modules
Editing a module will allow you to update its name or description, set tags and an estimated duration, update the content’s source, manage components and attachments associated with the module, and view any related schedule data, such as results and assessment history.
Navigating to a Module
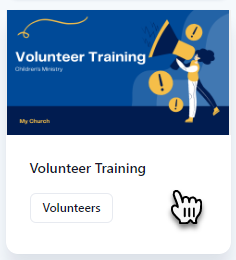
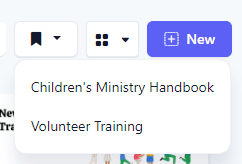
Navigate to a module through the Modules page or via a bookmark. Modules can be bookmarked so they can be accessed easily from global bookmarks or bookmarks on the Modules page.
Edit Title and Description
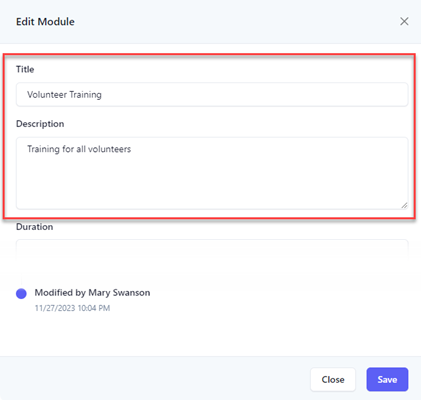
A module’s title will serve as the title for schedules associated with the module and when you need to reference a module as a component. The title can be updated as desired, unless the module was created from the content library or from YouTube, then this field is not editable. You can add a description to the module unless the module was created from the content library, then this field is not editable. The description will be visible to the user when they are viewing the content assigned to them.
Click the edit button to show the details view in edit mode.

Modify the title and/or description as desired. Click the Save button to save the changes.
Edit Duration
You can set an estimated duration for a module based on how long it should take a person to complete the content, such as 30 minutes. This duration is then used to compute the total duration it should take to complete the content when a module is assigned to teams.
Set the duration for what it should take to complete the current module, not all of the modules that comprise the content. If the module has components, an aggregate duration will be calculated based on the durations of each component.
Click the edit button to show the details view in edit mode.

OR click the duration link under the Module Details section.
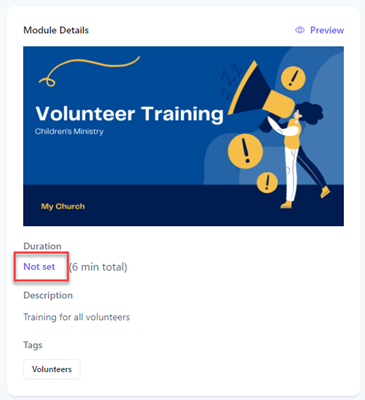
Modify the duration as desired. Use the format of X d Y h Z m, where d = days, h = hours, m = minutes. Ex. 1 h 30 m, 15 m, etc. Clear the field to remove the duration. Click the Save button to save the changes.
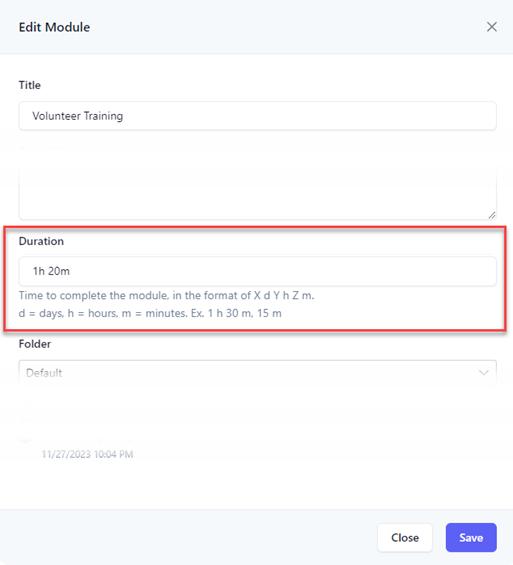
The duration for the module is updated, and if the module contains components, the aggregate time will be adjusted as well.

Edit Tags
Tags can be used to categorize your modules for searching. You can define as many tags as you need. Tags are only visible in the Modules page - they will not be visible to your teams when you assign content to them for review.
Click the edit button to show the details view in edit mode.

Modify the tags as desired. Select one or more tags from the existing list, or add a new tag by typing in the tag in the list and pressing the Enter key. Click the Save button to save the changes.
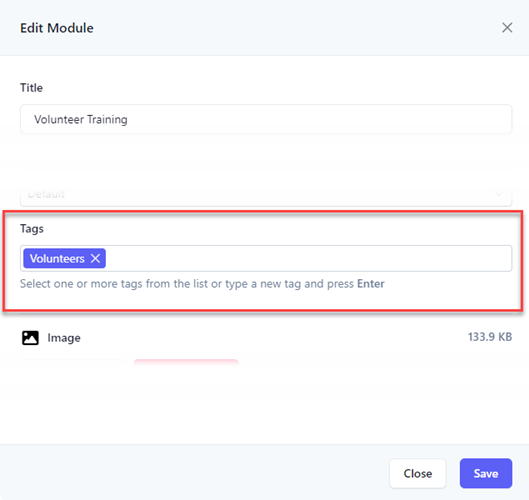
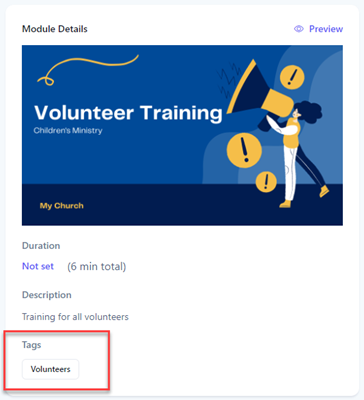
Upon success, tags are displayed in the Module Details section.
Move Module to New Folder
Modules are stored in folders. You can create a folder structure as needed to store your modules, and can move a module to any folder.
The module’s current folder is listed under the title of the module.

Click the edit button to show the details view in edit mode.

Select a new folder to move the module to and click the Save button to save the changes.
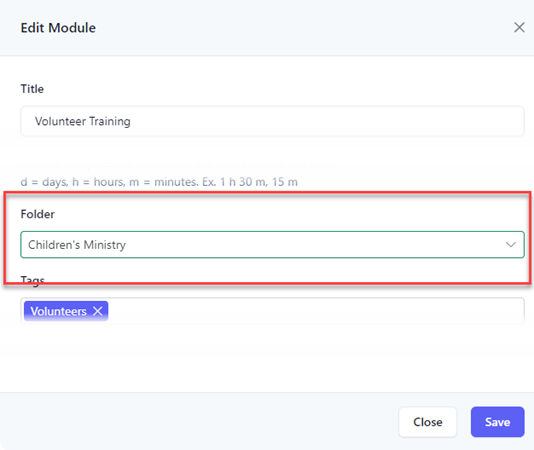
Upon success, the module is moved.

Update Module Content Source
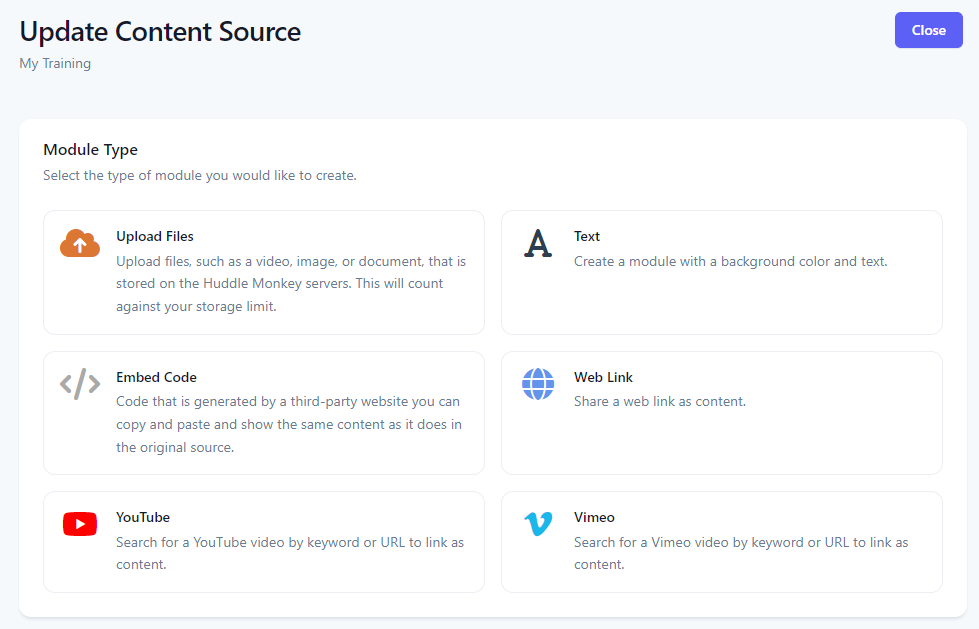
If you need to change a module’s content, such as updating a video or changing the type all together, you can update a module's content source without having to delete and re-create the module.
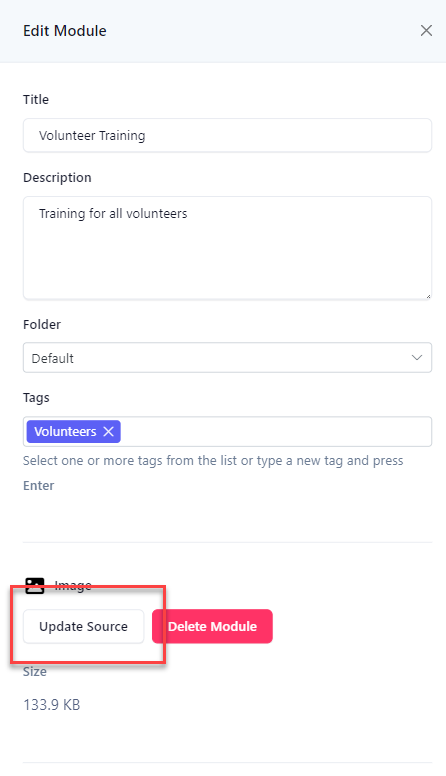
Click the edit button to show the details view in edit mode.

Click the Update Source button.
At the Update Content Source screen, refer to the instructions on how to set content for each type. Upon success, the changes are reflected back in the display panel.
View Content Type and Size
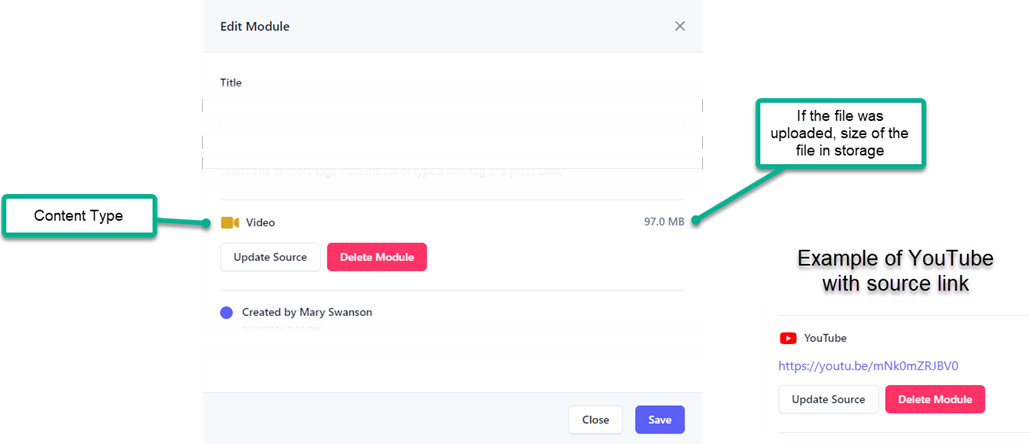
Each module will have a content type, such as image, video, YouTube, etc as well as a source for the content. That source can be a file, such as an uploaded video, or a web link or YouTube video id. Huddle Monkey can store content, such as videos, audio, graphics, and documents. This will count towards your organization’s storage limit. You can see how much storage a module is consuming as well as the content type of the module from the edit panel of the module.
| Type | Description | Counts towards storage limit |
|---|---|---|
| Files | Files that have been uploaded to Huddle Monkey storage, such as videos, audio, documents, and/or images. | |
| Embed Code | Content is rendered from an embed code. | |
| Web Link | Content shared from a web link. | |
| Text | Text banner. | |
| YouTube/Vimeo | Video shared from YouTube/Vimeo. |
Click the edit button to show the details view in edit mode.

If the module was uploaded and is stored on Huddle Monkey's servers, the size of the file is listed at the far right of the content type.
Module and Components
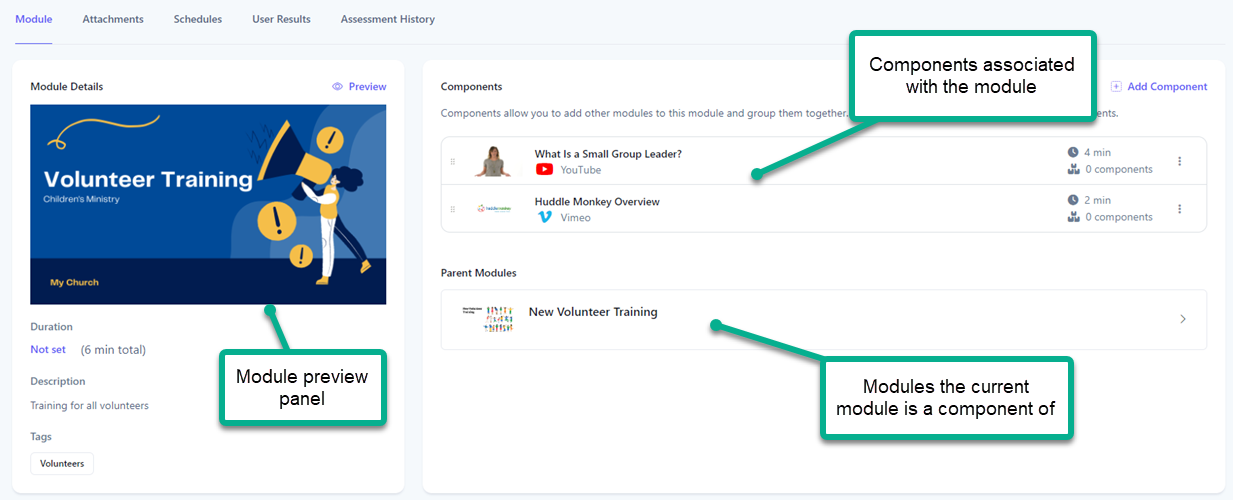
A module can consist of other modules, or components. When the module is scheduled to share with your teams, the components are included in the schedule. You can mix and match modules to build any combination of modules as needed. If a module contains a component that itself has components, those components will be included in the schedule as well. The module details and components are found under the Module tab.
Module Thumbnail
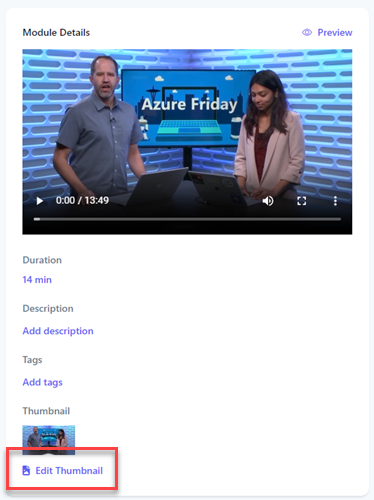
Modules that are a video, audio, embed code, or web link and are not generated from the library can have a custom thumbnail. The current thumbnail is shown under the Module Details. There are three different options for setting a thumbnail.
| Thumbnail | Description |
|---|---|
| Upload Image | Upload an image to serve as the thumbnail for the module. |
| Set to default thumbnail |
The default thumbnail is based on the content type (audio, video, embed code, or web link).

|
| Set based on content |
Set the thumbnail to an image specific to the content.
|
For a module that supports custom thumbnails, click the Edit Thumbnail link.
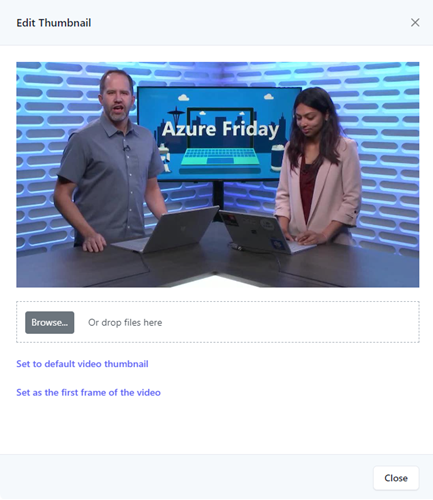
At the Edit Thumbnail flyout, either upload a custom image or select one of the other options for the thumbnail.
Adding a Component
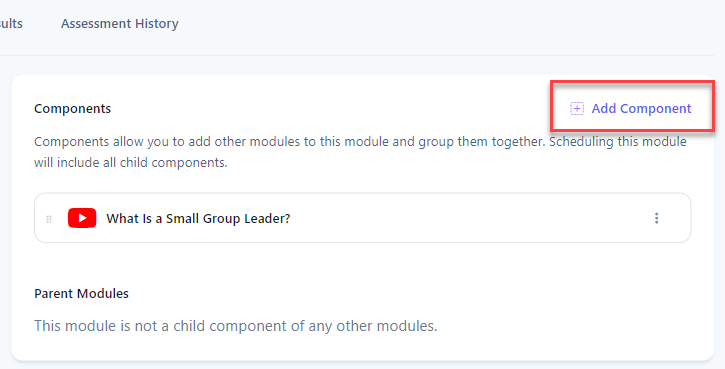
Click the Add Component button to add a new module as a component.
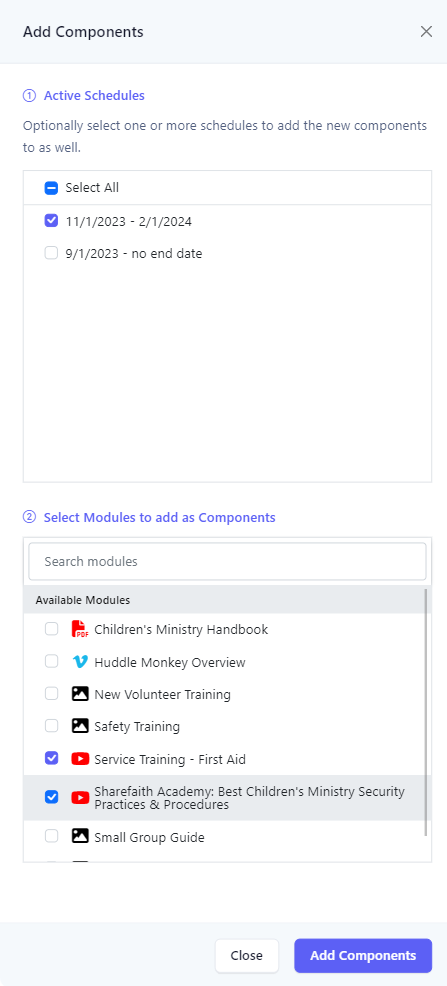
At the Add Components flyout, if the module has been associated with a schedule, optionally select one or more schedules to add the components to as well. The newly added components will then be made available on those schedules. Next, select the checkbox of the module(s) you want to add as child components to this module. Use the textbox to search for the module(s) by entering some characters of the module's title. Click Add Components to add the components to the module.
Upon success, the components are added to the list.
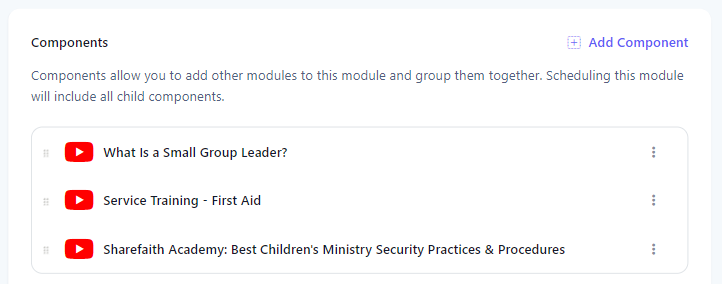
Removing a Component
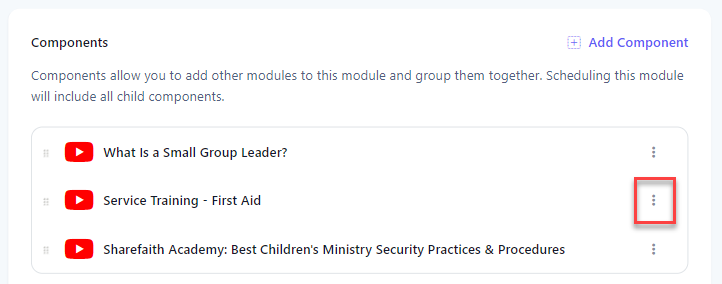
Click the vertical ellipse button of the component to remove.
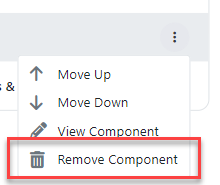
Select Remove Component from the menu.
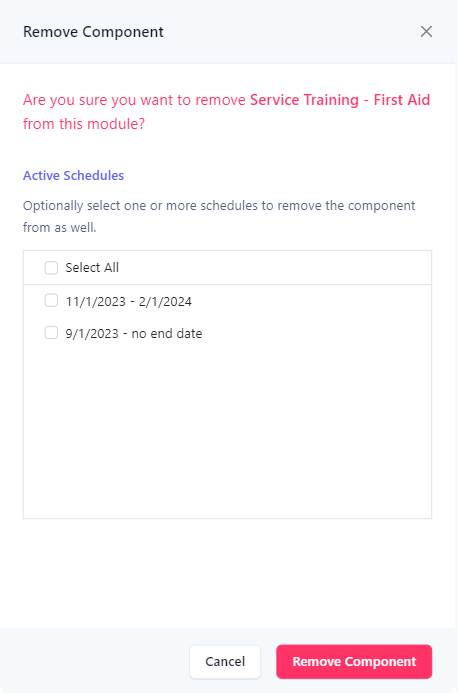
At the Delete Component flyout, if the component is part of any schedules, you can optionally remove the component from the schedule as well. To do this, select the checkbox of the schedule(s) you want to remove the component from in the list found in the Active Schedules section. This section is only visible if the module is associated with any active schedules. Click the Remove Component button.
Upon success, the component is removed from the list.

Changing the Order of the Components
Use the drag handle to drag and drop the module to a new position.

OR, click the vertical ellipse button of the component to move.

Select either Move Up or Move Down from the menu. Depending on where the component is currently in the list, up or down may not be an option.

Upon success the component is moved.

Previewing the Module
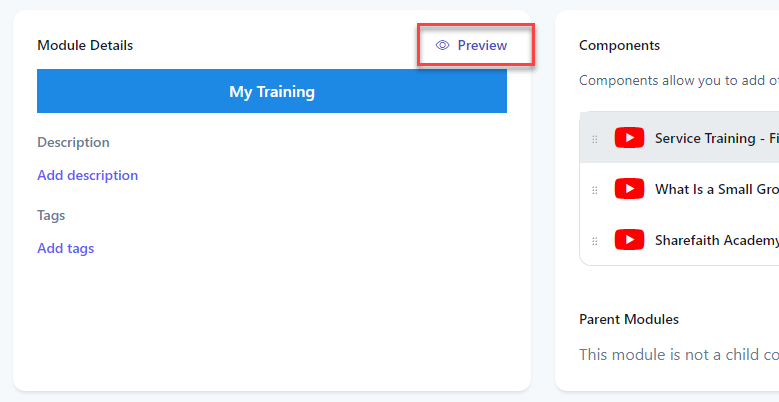
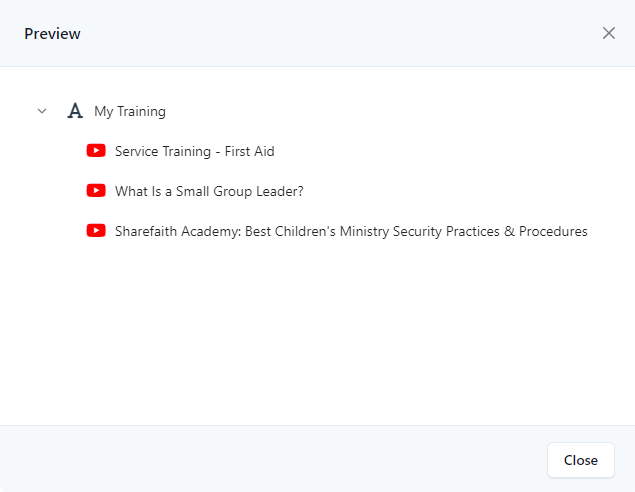
You can preview the module to see how it will appear to a user when shared. It will expand all child components in a flat list so you can see the full preview. The preview is live so you can select the modules in the list and interact with them and play videos, etc.
Click the Preview button.
The Preview flyout will show a list of all of the modules as it will be presented to the user as well as a tree of the component hierarchy.
Attachments
Modules can have associated attachments. Attachments are useful if you want to include files with a module but do not want to create a module for the file to include as a child component. The Attachments tab lists attachments currently associated with the module.

Adding an Attachment
Click the Add Attachment button to add a file as an attachment to the module.

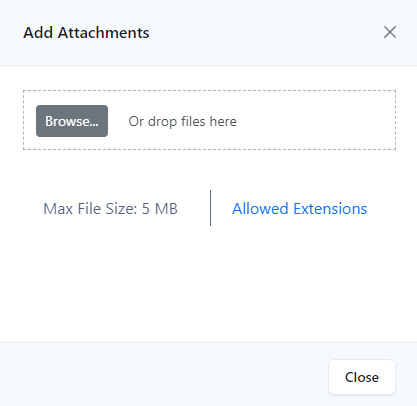
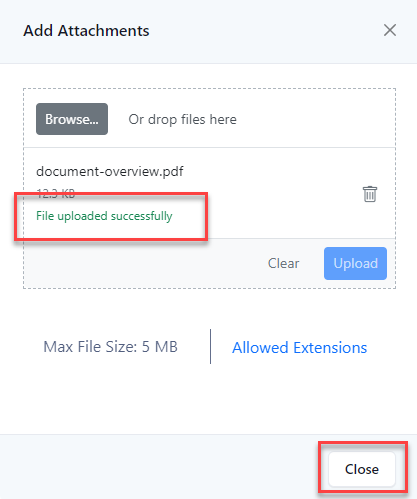
At the Add Attachments flyout, click the Browse button, and at the file selection dialog box, select a file(s) to add as an attachment. You can also drag and drop the desired file(s) into the drop area.
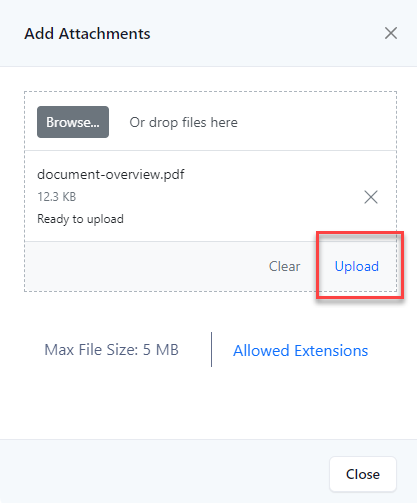
Click the Upload button to upload the file(s).
When the file has successfully been uploaded, you will see a success message, and you can click the Close button to dismiss the flyout.
The attachments are added to the list.

Removing an Attachment
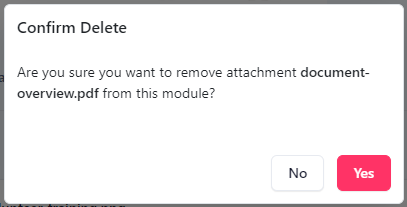
Click the delete button of the attachment to remove.

At the Confirm Delete dialog, select Yes.
Schedules
The Schedules tab lists all schedules, current, past, and present, associated with this module. You can create a new schedule for this module, delete a schedule, or navigate to an existing schedule for editing. This functionality can also be done from the Schedules page. This view allows the advantage of only focusing on schedules for this module.

Adding a Schedule
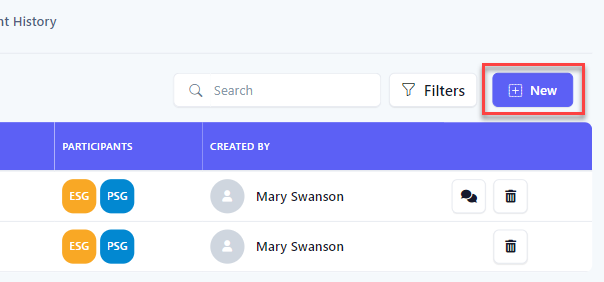
Click the New button to add a new schedule for this module.
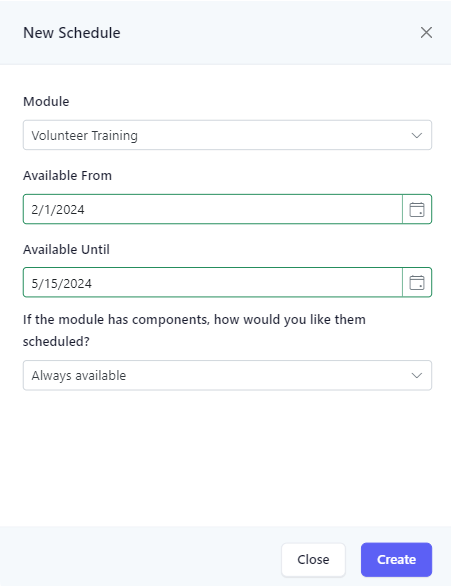
At the New Schedule flyout, select the dates for the schedule using the Available From and Available Until text boxes. You can set the schedule so it is currently available or set it to be available in the future. Leave the Available Until date empty to set the content to always be available.
If the module you are scheduling has child components, you can set how the child components are scheduled using the If the module has components, how would you like them scheduled? dropdown. There are several default options available. You can also create templates for each module that will show up in the list as well.
| Option | Description |
|---|---|
| Always available | All child components will have their available from dates set to the same available from date as the main schedule. |
| Daily | The first child component will start on the same date as the schedule's start date. Each child component that comes next will start one day after the previous component. |
| Weekly | The first child component will start on the same date as the schedule's start date. Each child component that comes next will start one week after the previous component. |
| Every other week | The first child component will start on the same date as the schedule's start date. Each child component that comes next will start every other week after the previous component. |
| Monthly | The first child component will start on the same date as the schedule's start date. Each child component that comes next will start one month after the previous component. |
| Custom | The child components will follow the description of the schedule template created for the module. |
Regardless of what method you use, you can always adjust the dates on the schedule as needed.
Click the Create button to create the new schedule. Upon success, you will be redirected to the edit schedule page.
Editing a Schedule
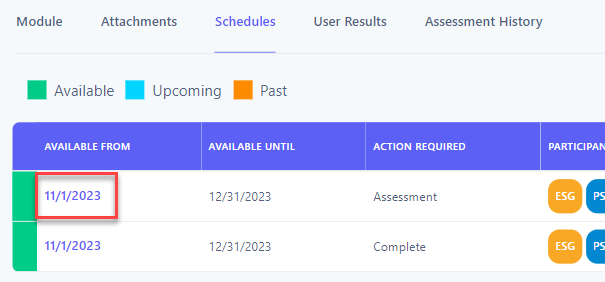
Click the link under the Dates column of the schedule you would like to edit. You will be redirected to the edit schedule page.
Deleting a Schedule
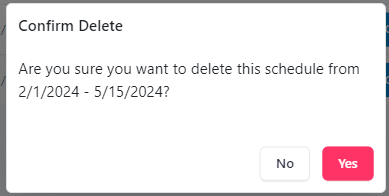
Click the delete button of the schedule to delete.

At the Confirm Delete dialog, select Yes.
Viewing the Conversation
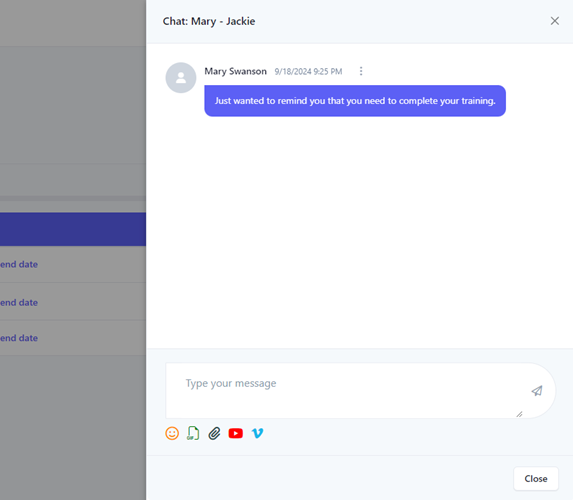
If a schedule has a conversation enabled, click the chat button to view the conversation in chat mode.

Searching Schedules
You can further refine the list by searching for schedules based on the desired search criteria. Using the filter panel, you can select one or more search criteria. The table below describes the different types of search criteria.
| Search Criteria | Description |
|---|---|
| Availability |
Search for content based on the availability of the schedule.
Currently Available - Schedule is currently available for the user to view
Upcoming - Schedule is not yet available
Past - Schedule is no longer available for the user to view
|
| Action Required |
Search based on the required action.
None - No action is required of the user
Complete - User must complete the content
Assessment - User must complete the content and take an assessment
|
| Participants | Search for schedules that have been assigned to the teams or users. |
| Created By | Search based on who created the schedule. |
| Conversation Enabled | Toggle this field to search for schedules that have an associated conversation. |
You can search using a simple search or using the filter panel for a more refined search. To perform a simple search, enter the desired search criteria into the Search box. This will dynamically update the list of schedules that contain the text entered in the search box.

For a more refined search, click the Filters button to reveal the filter panel.

In the Filter Schedules panel, select your search criteria and click the Filter button. Click the Clear button to clear all filters.
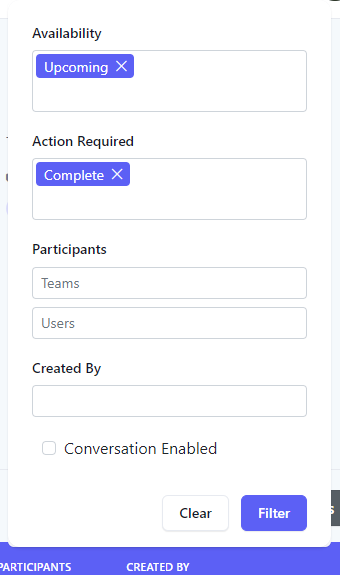
The results of the filter are then shown in the table. When a filter is set, the number of filters applied will appear next to the text in the Filters button.

User Results
If a module is associated with any schedules with a required action, you can track each user's progress for the schedule on the User Results tab. This can also be done from the Schedules page to see required actions for a specific schedule. This view will show all required actions across all schedules that you have access to for this module. Action Required can have the following values:
| Action Required | Description |
|---|---|
| None | No action is required for the scheduled content. |
| Complete | Users must complete the scheduled content and then mark the content as completed. |
| Assessment | Users must complete the scheduled content and then pass an assessment to test their knowledge of the content. |
The Progress column will indicate the user’s progress for the schedule. Individuals who have completed the action will have a green checkmark. If not yet completed, the progress is indicated with a percentage complete. Users who have completed the content but have not yet taken the assessment will have a status of “Pending Assessment”.
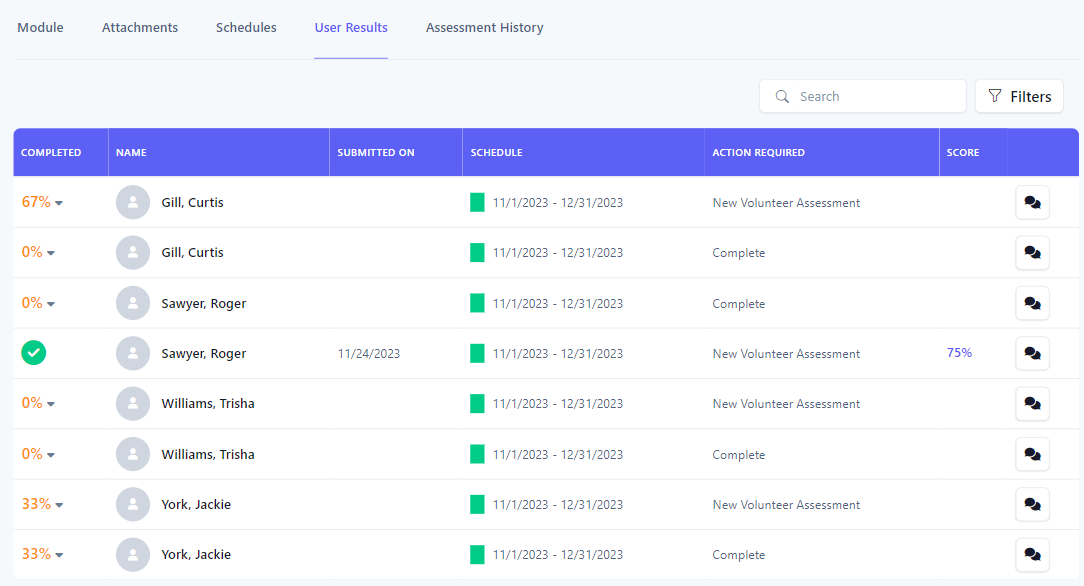
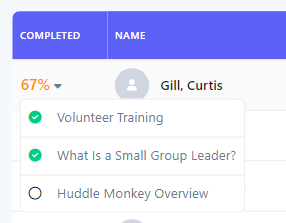
If not yet completed, you can click on the percentage to view a dropdown with the content the user has completed and what is yet to be completed.
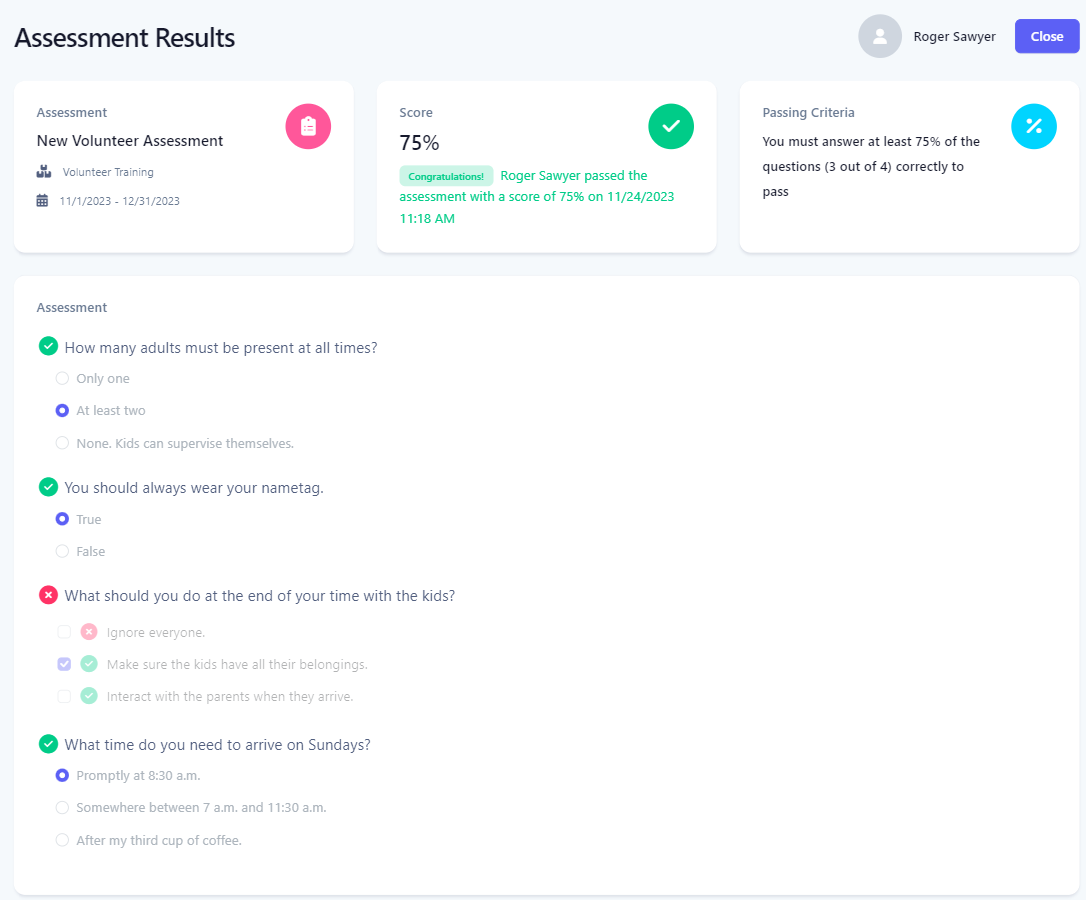
If the required action was to take an assessment, you will also see their Score. Click the link to view the user's assessment results.

The user's assessment results are shown in a new screen where you can review their answers.
Searching Results
You can further refine the list of results by searching based on the desired search criteria. Using the filter panel, you can select one or more search criteria. The table below describes the different types of search criteria.
| Search Criteria | Description |
|---|---|
| Progress |
Search based on the user’s progress.
Not Started - User has not yet started the content (0% complete)
In Progress - User has started the content
Pending Assessment - User has completed the content but has not yet taken the required assessment
Completed - User has completed the content
|
| User | Search by user. |
| Availability |
Search for content based on the availability of the schedule.
Currently Available - Schedule is currently available for the user to view
Upcoming - Schedule is not yet available
Past - Schedule is no longer available for the user to view
|
| Schedules | Search based on the schedules. |
| Action Required |
Search based on the required action.
None - No action is required of the user
Complete - User must complete the content
Assessment - User must complete the content and take an assessment
|
| Assessments | Search based on the assessment that is associated with the content. |
| Score | Search based on the score of the assessment. |
You can search using a simple search or using the filter panel for a more refined search. To perform a simple search, enter the desired search criteria into the Search box. This will dynamically update the list of results that contain the text entered in the search box.

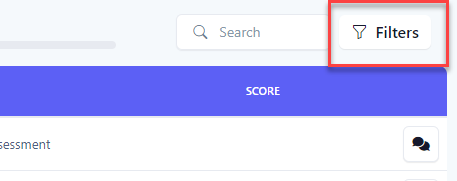
For a more refined search, click the Filters button to reveal the filter panel.
In the Filter Results panel, select your search criteria and click the Filter button. Click the Clear button to clear all filters.
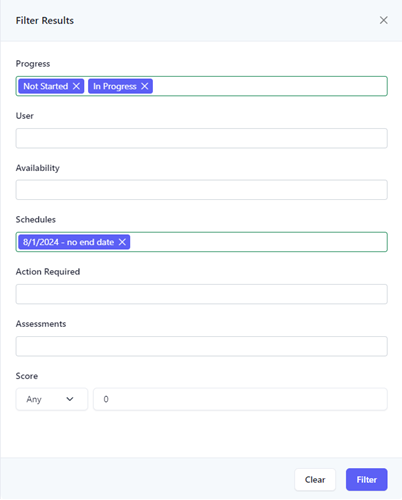
The results of the filter are then shown in the table. When a filter is set, the number of filters applied will appear next to the text in the Filters button.

Send User a Message
You can send a message to a user without having to specifically create a conversation with that user or navigate to the conversations page to view the conversation. When you send a direct message to a user, if a conversation does not already exist between you and the specific individual, a new conversation will automatically be created for you.
Click the Message button.

The conversation is created if needed and displayed in the flyout window, where you can then send a message to the user.
Assessment History
If the module is associated with any schedules with an assessment as a required action, the Assessment History tab shows the breakdown of how users are doing with the assessment. This view is not user specific, but rather gives a statistical summary of how users are doing with the assessment. Modules can be associated with more than one assessment and schedule. You can filter by assessment and/or schedule for a more refined view. This functionality can also be accomplished from the Schedules page to see assessment history for a specific schedule. This view will show all assessment history across all schedules that you have access to for this module.
By default, the results are filtered by the first assessment in the list and against all schedules.
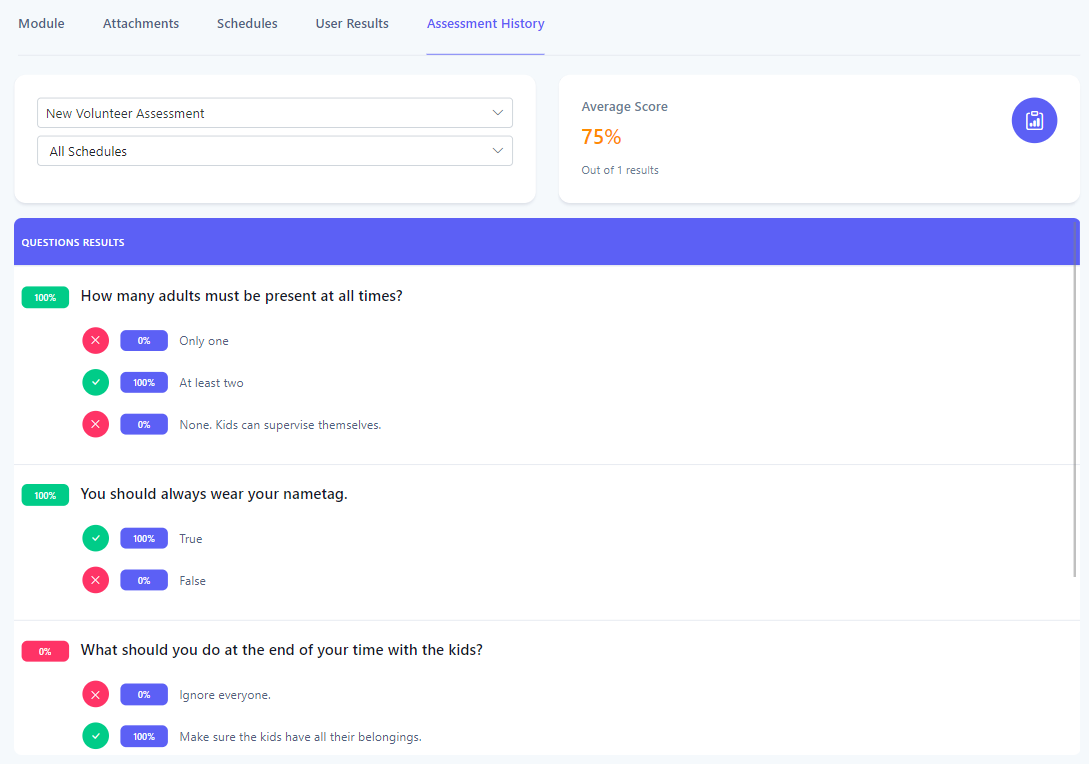
If the module was associated with more than one assessment, you can select the assessment to show the results for. You can also filter the results against a specific schedule.
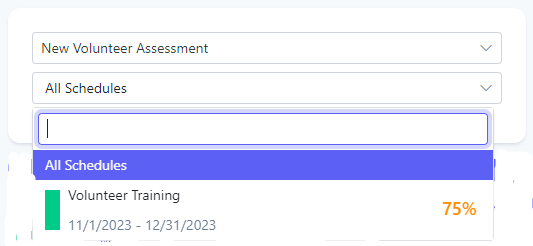
The Average Score panel will show the average score of the assessments submitted filtered by the selected assessment and schedules.

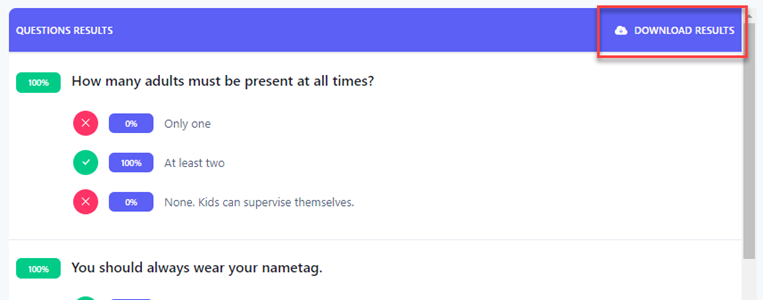
Each question is then displayed with an indicator of how many people answered the question correctly as well as the breakdown of how people answered the question.
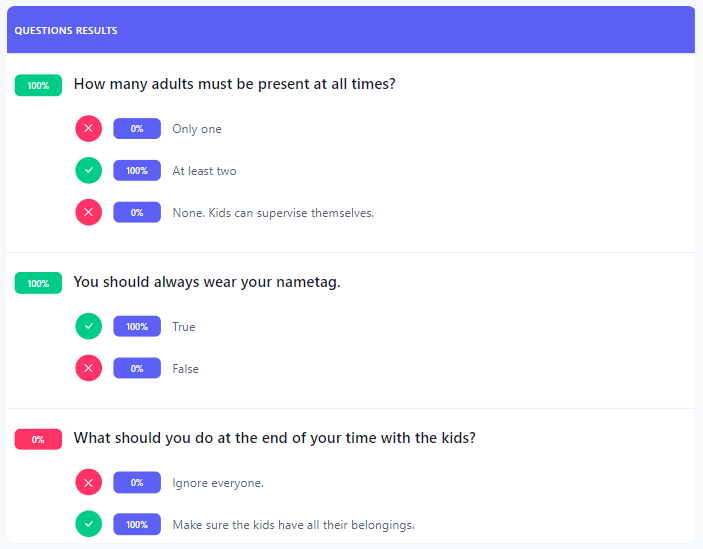
To see a full breakdown of how each user answered the questions, click the Download Results button to generate a PDF.
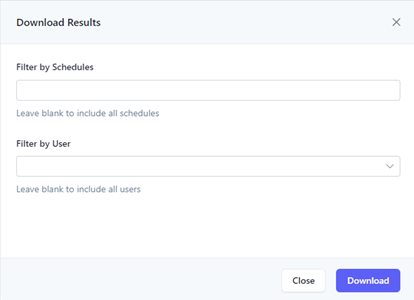
At the Download Results flyout, you can optionally filter by schedule and/or user. Leave them blank to get all of the results. Click Download to generate the report.
Library Provider
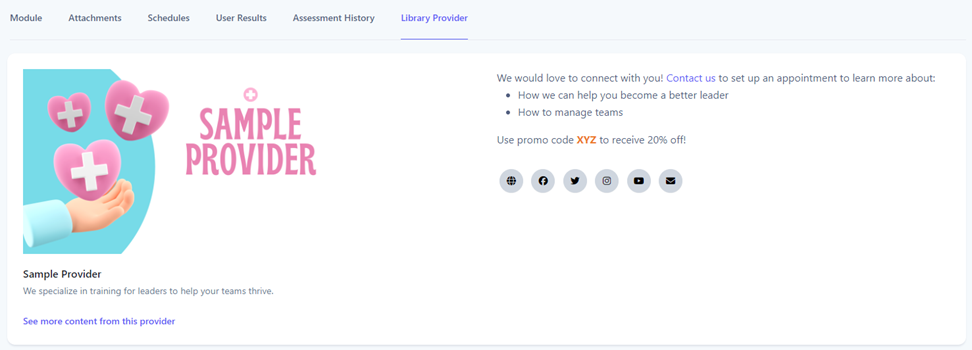
If the module was generated from the content library, the Library Provider tab will detail more information on the content provider.
Bookmark Module
Bookmarking a module allows you to easily navigate to the module from the global bookmarks..
Click the Bookmark button. Click again to delete the bookmark.

