Editing Users
Editing a user will allow you to update their name or email, add the user to teams, view their pending required actions and action required history, and resend the welcome email or reset their password.
Navigating to a User
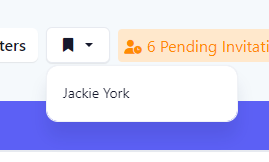
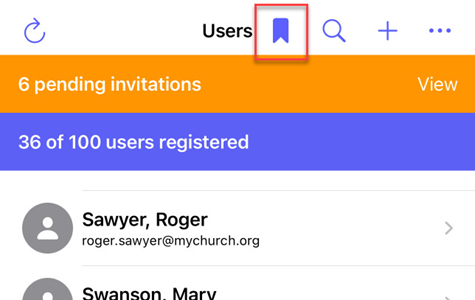
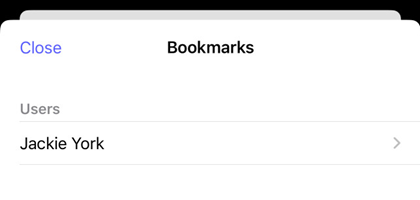
Navigate to a user through the Users page or via a bookmark. Users can be bookmarked so they can be accessed easily from global bookmarks or bookmarks on the Users page.
Edit User Profile
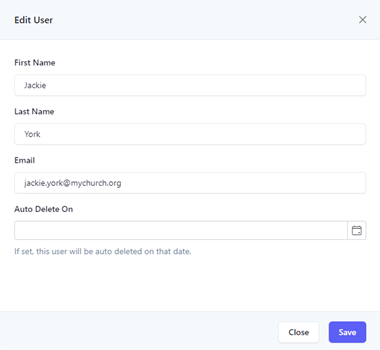
This section will walk you through how to edit a user's first name, last name, and/or email address. You can also make the user a temporary user by setting the Auto Delete On property to the date their accounts are no longer needed. The accounts will be automatically deleted on that date, freeing up your user limit if your plan limits the number of users that can be created.
At the Edit User page, click the Edit button.

At the Edit User flyout, update the user's first name, last name, and/or email as necessary. If this is a temporary user, you can use the Auto Delete On field to set a date when the user will be automatically deleted. Click the Save button to save the changes.
If the user has a profile picture, you have the option to remove it and revert back to the default profile graphic. Under the Profile picture section, click the Remove button and then confirm.
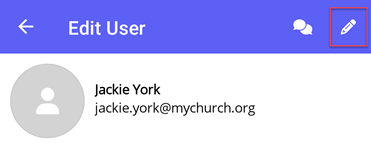
At the Edit User page, select the Edit icon.
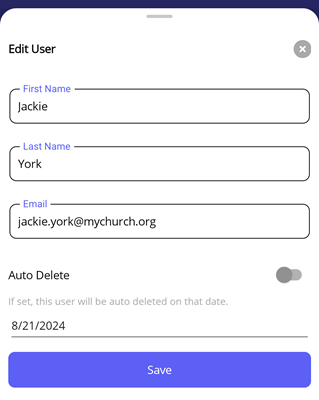
At the Edit User flyout, update the user's first name, last name, and/or email as necessary. If this is a temporary user, you can toggle the Auto Delete field and set a date when the user will be automatically deleted. Select the Save button to save the changes.
If the user has a profile picture, you have the option to remove it and revert back to the default profile graphic. Under the Profile picture section, select the Remove button and then confirm.
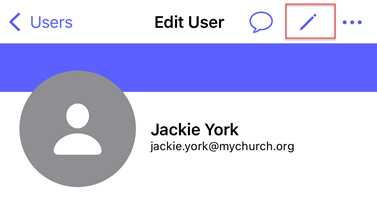
At the Edit User page, select the Edit icon.
At the Edit User flyout, update the user's first name, last name, and/or email as necessary. If this is a temporary user, you can use the Auto Delete On field to set a date when the user will be automatically deleted. Select the Update button to save the changes.
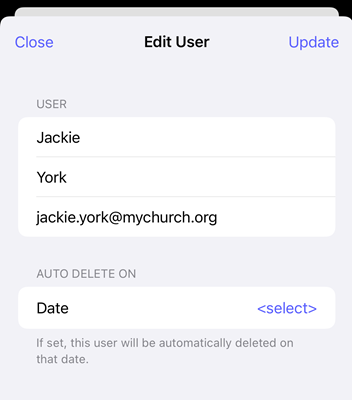
If the user has a profile picture, you have the option to remove it and revert back to the default profile graphic. Under the Profile Picture section, select the Remove profile picture button and then confirm.
Teams
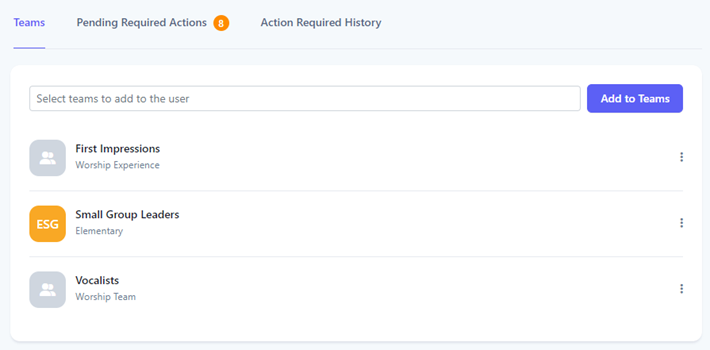
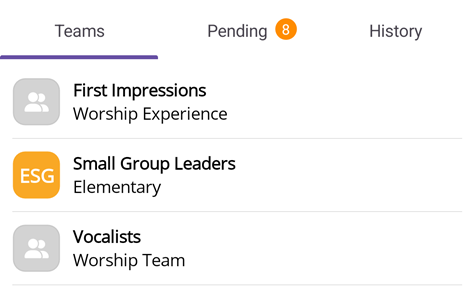
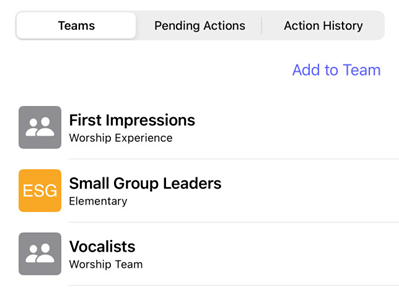
Users can be added to one or more teams. Teams are used in Huddle Monkey to group users together and are used to invite groups of users into a conversation, announcements, and target scheduled content for viewing. You can assign one or more team leaders for each team. The teams the user is a member of, if any, are listed under the Teams tab.
Add User to a Team
Select one or more teams to add the user to from the dropdown list. You can either select a team directly from the list or search for teams by entering any of the characters contained in the team.
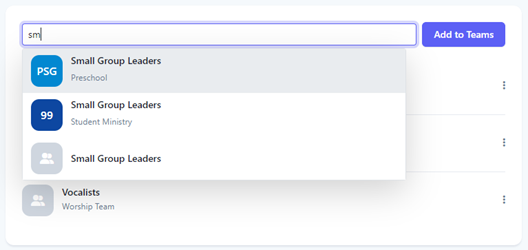
Once you have selected all the teams to add for the user, click Add to Teams.
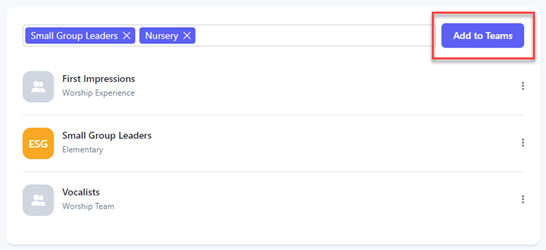
Upon success, the teams are now listed and the user is notified they have been made a member of those teams.
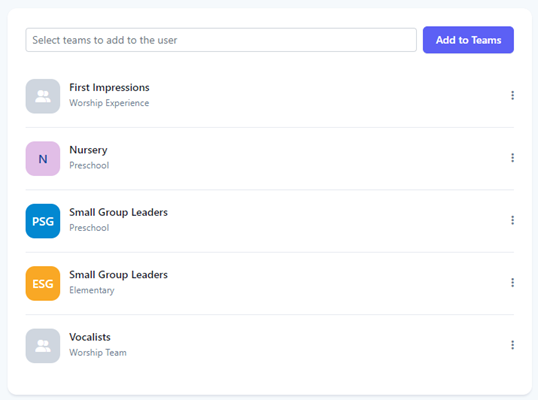
Select the Add to Teams button.
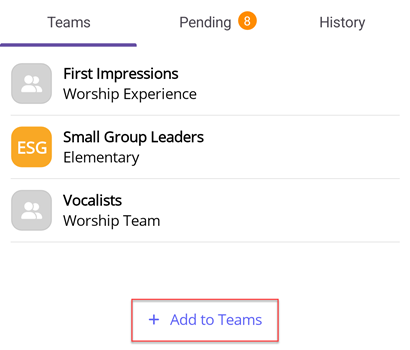
At the Add Teams flyout, select one or more teams to add the user to from the dropdown list. You can either select a team directly from the list or search for teams by entering any of the characters contained in the team.
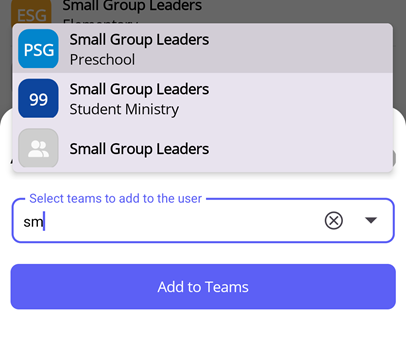
Once you have selected all the teams to add for the user, select Add to Teams.
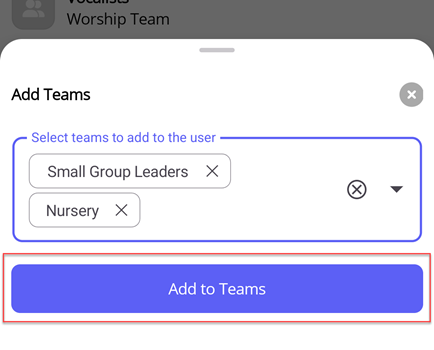
Upon success, the teams are now listed and the user is notified they have been made a member of those teams.
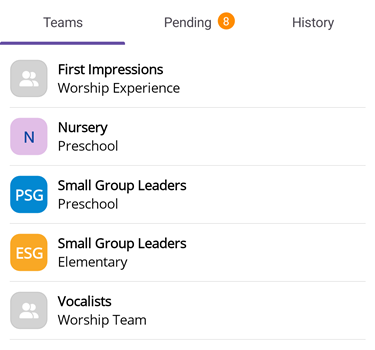
Select the Add to Team button.
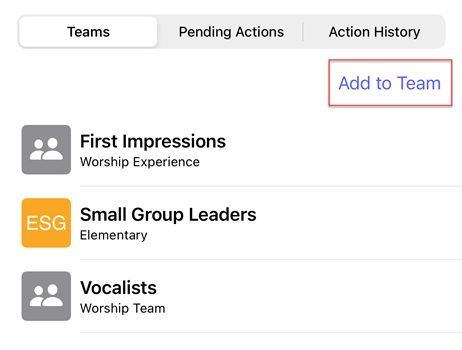
At the Select Teams flyout, select one or more teams to add. Once you have selected all the teams to add for the user, select Add to Teams.
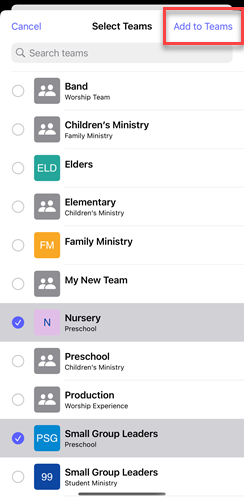
Upon success, the teams are now listed and the user is notified they have been made a member of those teams.
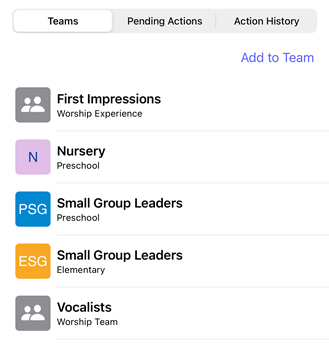
Remove User from Team
Click the vertical dots for the team you want to remove from the user.

At the dropdown menu, select Remove from Team.
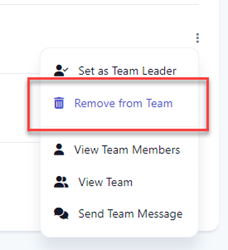
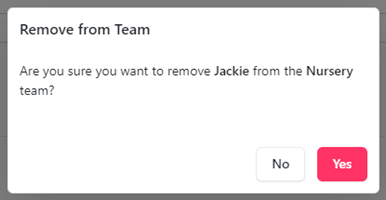
At the Remove from Team dialog box, click Yes.
Select the team you want to remove from the user.

At the flyout, select Remove from Team.
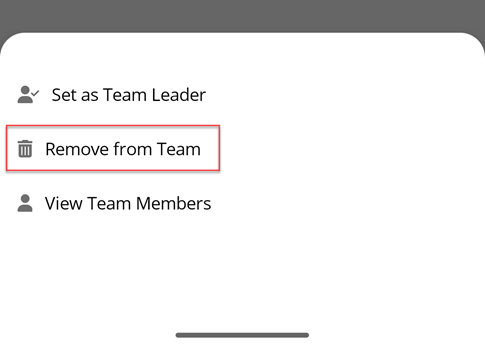
At the Remove from Team dialog box, select Yes.
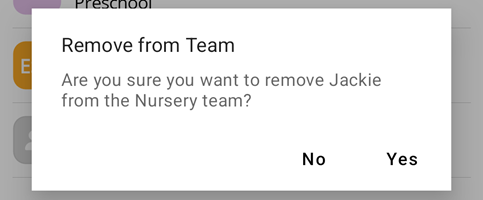
Select the team you want to remove from the user.

At the flyout, select Remove from Team.
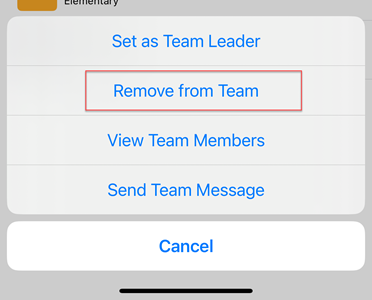
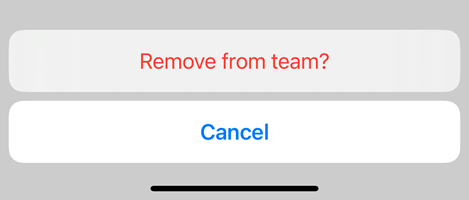
Select Remove from team? to confirm.
Make User a Team Leader
You can assign one or more team leaders for each team. A user assigned as a team leader has the following permissions in Huddle Monkey:
- Create modules and schedule them for any team they lead plus teams below them in the hierarchy
- Initiate a conversation with any team and/or user in the organization
- Create users and assign them to any team they lead plus teams below them in the hierarchy
- Create, edit, or delete teams below the team they lead in the hierarchy
Click the vertical dots for the team you want to set the user as a team leader.

At the dropdown menu, select Set as Team Leader.
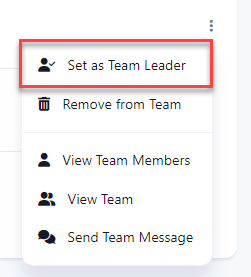
Upon success, the user is set as a team leader, as indicated by the Team Leader badge.

Select the team you want to set the user as a team leader.

At the flyout, select Set as Team Leader.
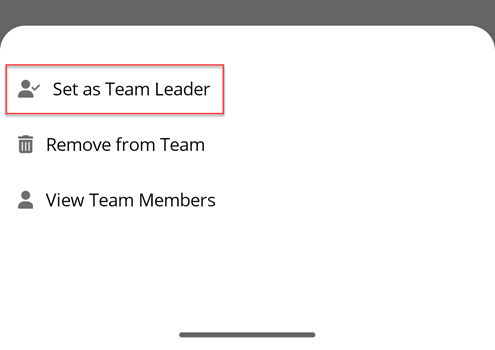
Upon success, the user is set as a team leader, as indicated by the Team Leader badge.

Select the team you want to set the user as a team leader.

At the flyout, select Set as Team Leader.
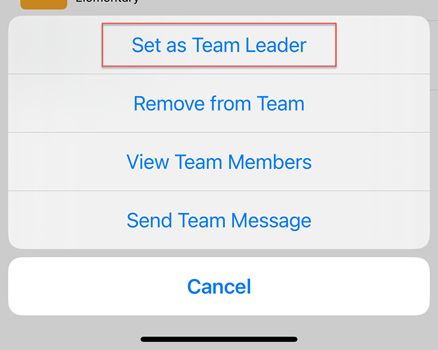
Upon success, the user is set as a team leader, as indicated by the Leader badge.

Remove User as Team Leader
Click the vertical dots for the team you want to remove the user as a team leader.

At the dropdown menu, select Remove as Team Leader.
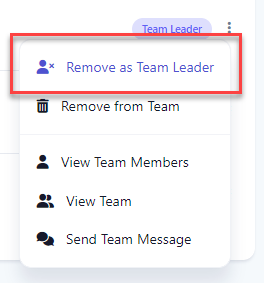
At the Remove as Team Leader dialog box, click Yes.
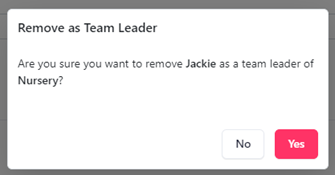
Upon success, the user is removed as a team leader.

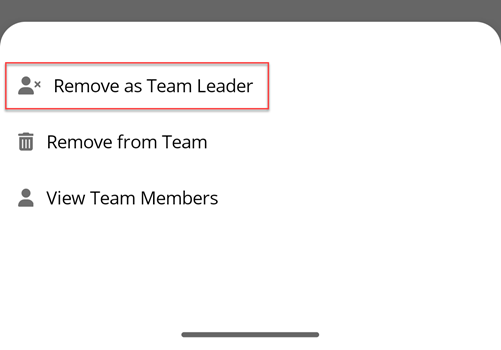
Select the team you want to remove the user as a team leader.

At the flyout, select Remove as Team Leader.
At the Remove as Team Leader dialog box, select Yes.
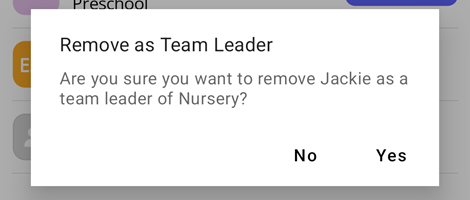
Upon success, the user is removed as a team leader.

Select the team you want to remove the user as a team leader.

At the flyout, select Remove as Team Leader.
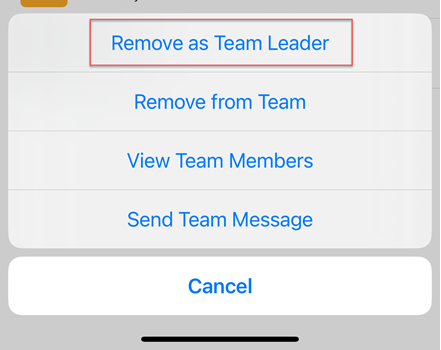
Select Remove as team leader? to confirm.
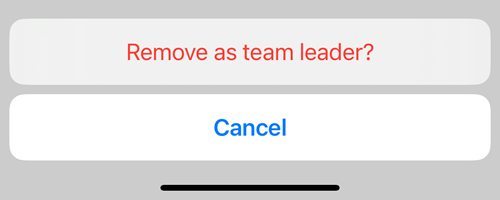
Upon success, the user is removed as a team leader.

View Team Members
You are able to view team members, send the team a message, or send an individual team member a message.
Click the vertical dots for the team you want to view the members.

At the dropdown menu, select View Team Members or select Send Team Message to send a message to the team.
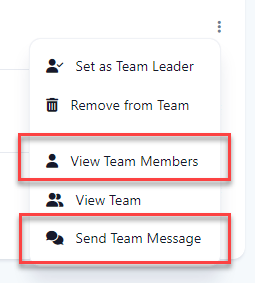
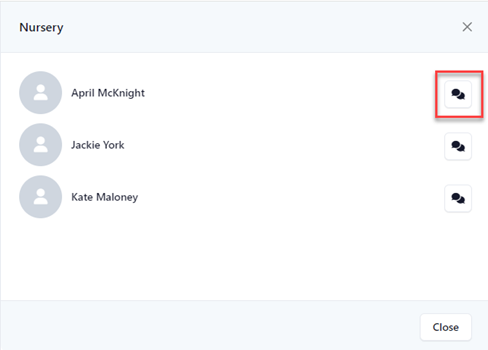
At the team members flyout, click the Message button to send the team member a message.
Select the team you want to view the members.

At the flyout, select View Team Members.
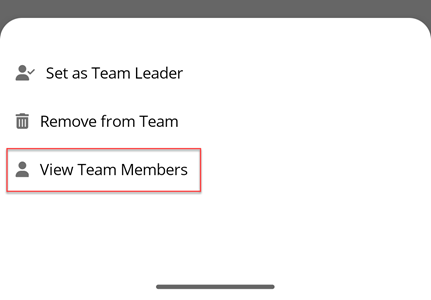
At the team members flyout, select the Message icon to send the team member a message.
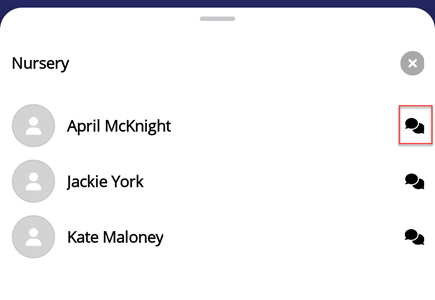
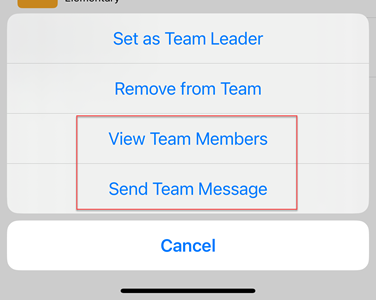
Select the team you want to view the members.

At the flyout, select View Team Members or select Send Team Message to send a message to the team.
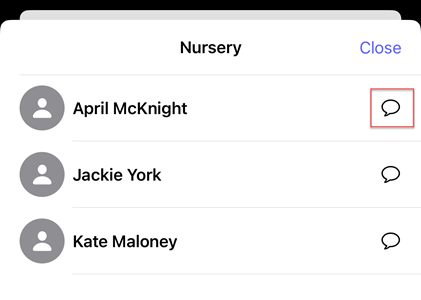
At the team members flyout, select the Message icon to send the team member a message.
Pending Required Actions
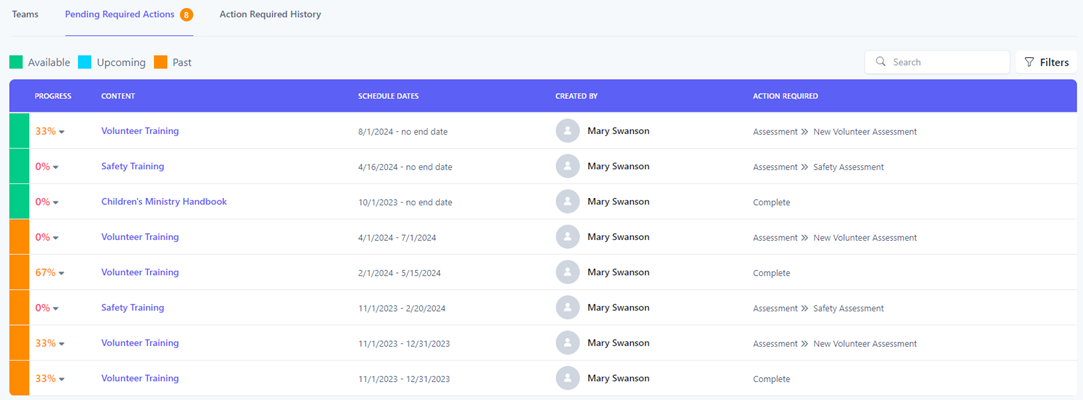
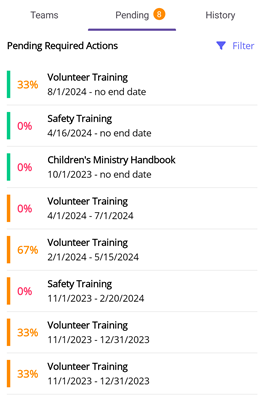
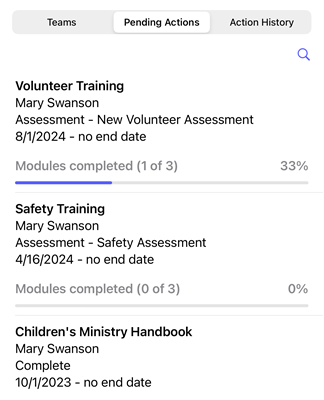
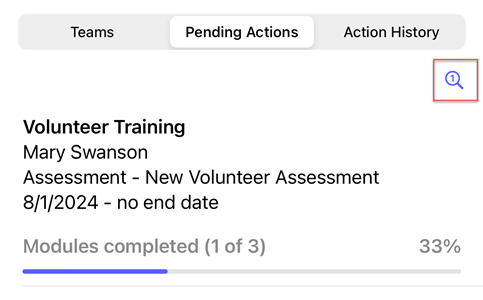
Users may be assigned content with a required action where they must either complete the content or take an assessment to test their knowledge. You can view the user's pending required actions that they have yet to complete under the Pending Required Actions tab.
Viewing Progress
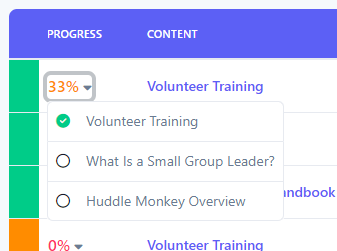
You can see the user's progress with each schedule to view how far along they are and what modules they have completed.
Click the percentage to view a dropdown listing the progress. If the user has completed all of the modules but has not taken the required assessment, the progress column will display Pending Assessment.
Tap the row to view a flyout listing the progress.
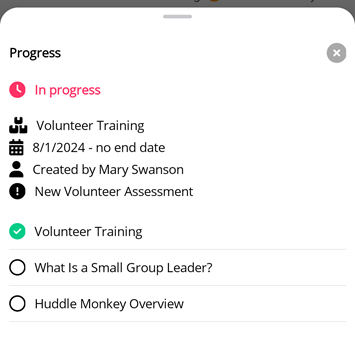
Tap the progress bar to view a flyout listing the progress.
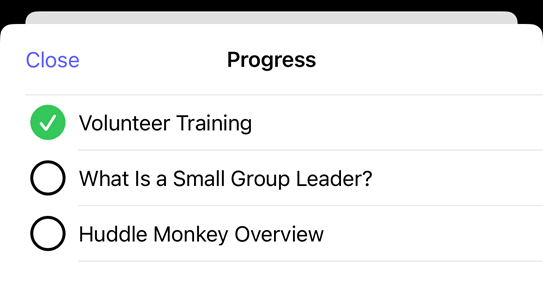
Filter Progress
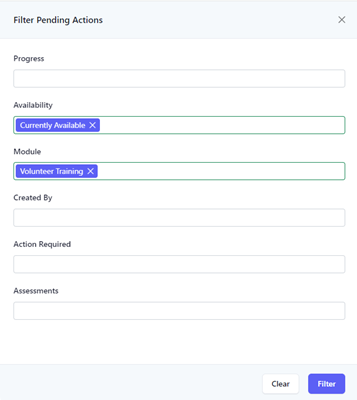
You can further refine the list of pending actions by searching based on the desired search criteria. Using the filter panel, you can select one or more search criteria. The table below describes the different types of search criteria.
| Search Criteria | Description |
|---|---|
| Progress |
Search based on the user’s progress.
Not Started - User has not yet started the content (0% complete)
In Progress - User has started the content
Pending Assessment - User has completed the content but has not yet taken the required assessment
|
| Availability |
Search for content based on the availability of the schedule.
Currently Available - Schedule is currently available for the user to view
Upcoming - Schedule is not yet available
Past - Schedule is no longer available for the user to view
|
| Module | Search based on the modules that have been scheduled. |
| Created By | Search based on who created the schedule. |
| Action Required |
Search based on the required action.
None - No action is required of the user
Complete - User must complete the content
Assessment - User must complete the content and take an assessment
|
| Assessments | Search based on the assessment that is associated with the content. |
You can search using a simple search or using the filter panel for a more refined search. To perform a simple search, enter the desired search criteria into the Search box. This will dynamically update the list of pending actions with those whose content, schedule dates, or assessment name contain the text entered in the search box.

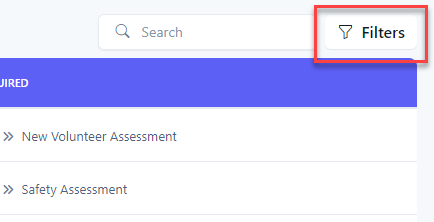
For a more refined search, click the Filters button to reveal the filter panel.
In the Filter Pending Actions panel, select your search criteria and click the Filter button. Click the Clear button to clear all filters.
The results of the filter are then shown in the table. When a filter is set, the number of filters applied will appear next to the text in the Filters button.

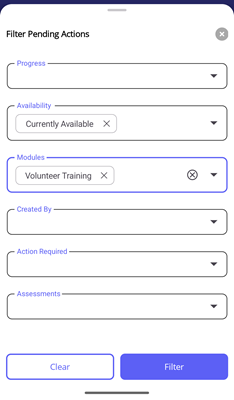
Select the Filter button to reveal the filter panel.
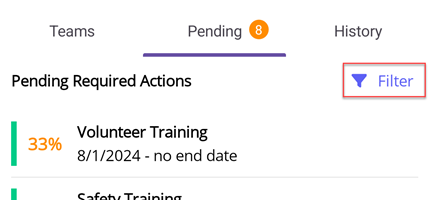
In the Filter Pending Actions panel, select your search criteria and select the Filter button. Select the Clear button to clear all filters.
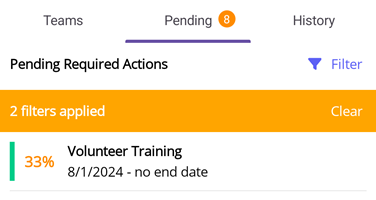
The results of the filter are then shown in the list. When a filter is set, an orange bar is displayed at the top indicating how many filters have been set. You can clear the filters from the bar by tapping the Clear link.
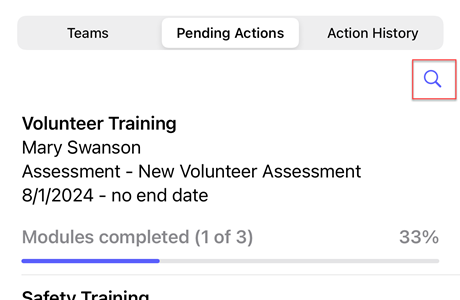
Select the Filter icon to reveal the filter panel.
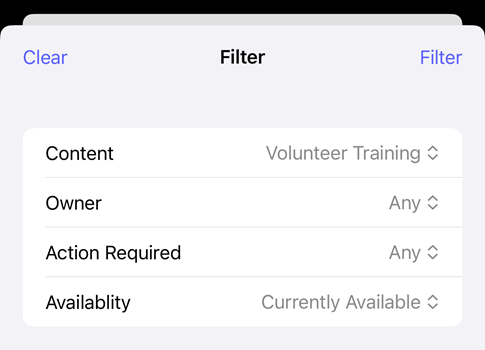
In the Filter panel, select your search criteria and select the Filter button. Select the Clear button to clear all filters.
The results of the filter are then shown in the list. When a filter is set, the Filter icon is changed to indicate a filter has been applied.
Action Required History
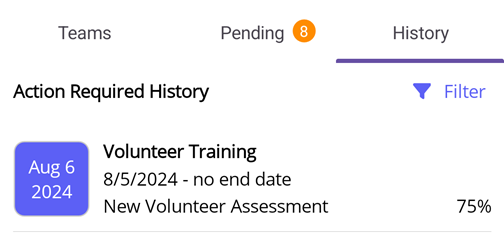
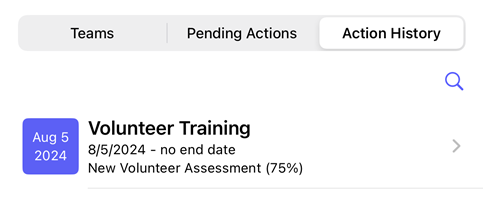
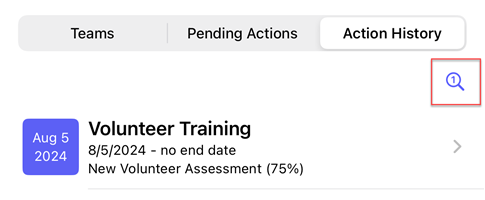
You can view the user's action required history for content they have already completed under the Action Required History tab. Here you can track training history for what modules they have completed, when it was completed, and view their assessment results if an assessment was associated with the content.

View Assessment Results
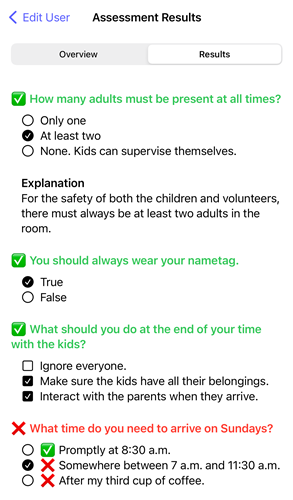
If the content has an assessment associated with it, you can view the user’s results of the assessment and see how they answered each question.
Click the assessment link to view the assessment results.

You will then be redirected to the assessment results, where you can review the score and the questions/answers results.
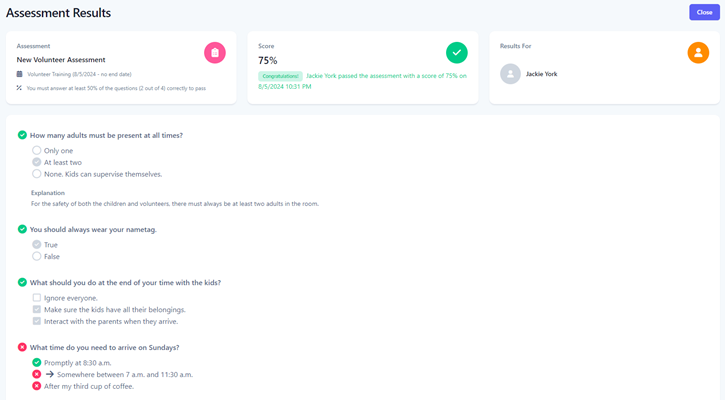
Tap the row to view the assessment results.

You will then be redirected to the assessment results, where you can review the score and the questions/answers results.
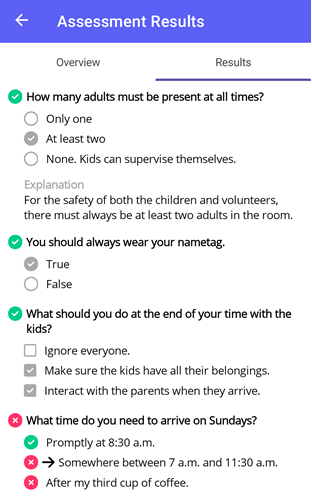
Tap the row to view the assessment results.

You will then be redirected to the assessment results, where you can review the score and the questions/answers results.
Filter History
You can further refine the history by searching based on the desired search criteria. Using the filter panel, you can select one or more search criteria. The table below describes the different types of search criteria.
| Search Criteria | Description |
|---|---|
| Module | Search based on the modules that have been completed. |
| Action Required |
Search based on the required action.
None - No action is required of the user
Complete - User completed the content
Assessment - User completed an assessmentt
|
| Assessments | Search based on the assessment that is associated with the content. |
| Score | For assessments, search for the score received. |
You can search using a simple search or using the filter panel for a more refined search. To perform a simple search, enter the desired search criteria into the Search box. This will dynamically update the list of history with those whose submitted date, module, schedule dates, assessment name, or score contain the text entered in the search box.

For a more refined search, click the Filters button to reveal the filter panel.

In the Filter History panel, select your search criteria and click the Filter button. Click the Clear button to clear all filters.
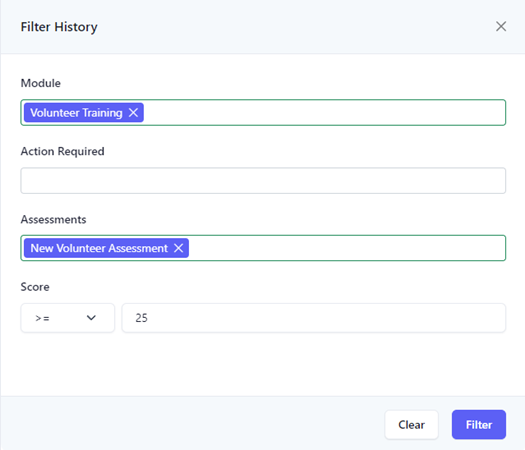
The results of the filter are then shown in the table. When a filter is set, the number of filters applied will appear next to the text in the Filters button.

Select the Filter button to reveal the filter panel.
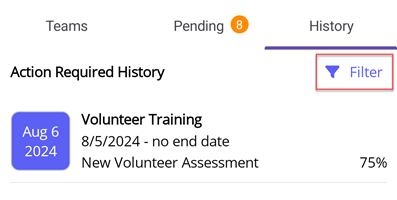
In the Filter History panel, select your search criteria and select the Filter button. Select the Clear button to clear all filters.
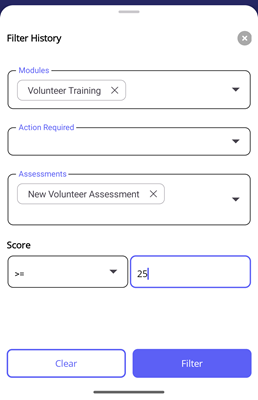
The results of the filter are then shown in the list. When a filter is set, an orange bar is displayed at the top indicating how many filters have been set. You can clear the filters from the bar by tapping the Clear link.
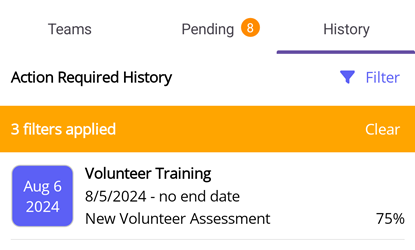
Select the Filter icon to reveal the filter panel.
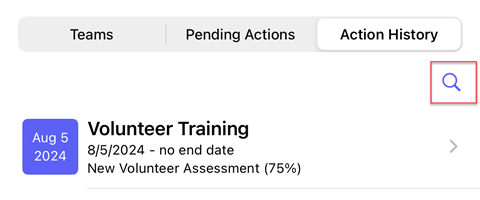
In the Filter panel, select your search criteria and select the Filter button. Select the Clear button to clear all filters.
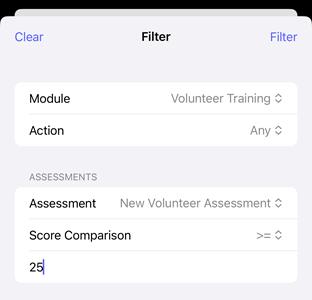
The results of the filter are then shown in the list. When a filter is set, the Filter icon is changed to indicate a filter has been applied.
Resend Welcome Email
When a user is created, they are sent an email with an invitation to join Huddle Monkey under your organization. The window to accept the invitation before it expires is 5 days. If the user does not accept the invitation within that window, the invitation link becomes invalid and they are unable to join. When that happens, you can resend the invitation email to the user.
Click the envelope button.

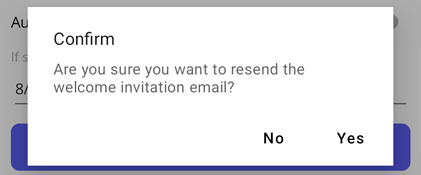
At the Confirm dialog, click Yes.
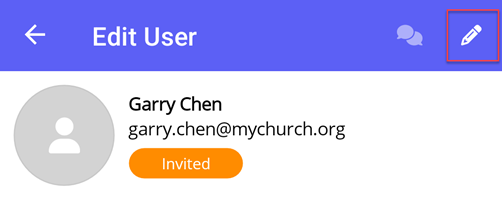
Select the Edit icon.
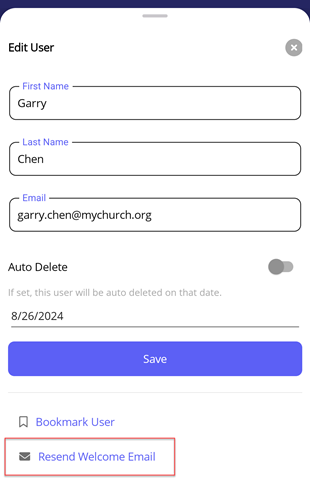
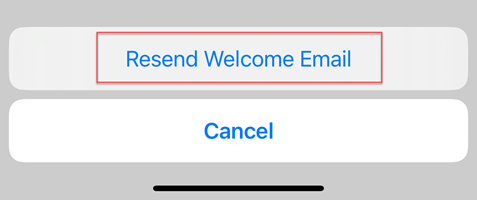
In the Edit User flyout, select Resend Welcome Email.
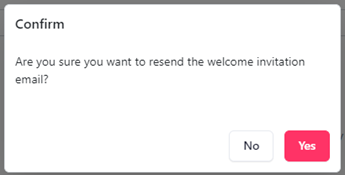
At the Confirm dialog, select Yes.
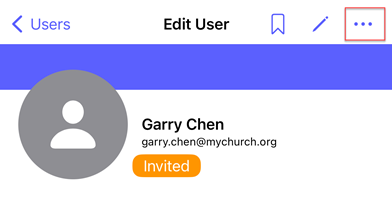
Select the Options icon.
In the flyout, select Resend Welcome Email.
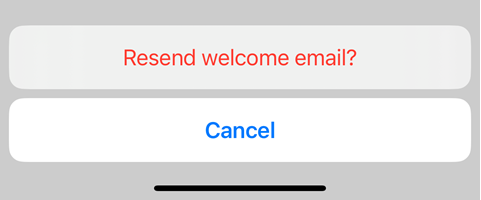
Select Resend welcome email? to confirm.
Reset User Password
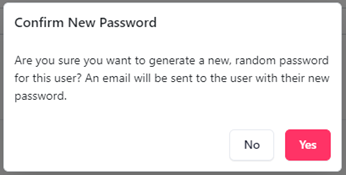
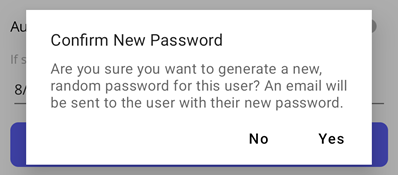
If a user has forgotten their password and is unable to use the Forgot Password feature, you can generate a random password for the user. This new password is then emailed to the user.
Click the key button.

At the Confirm New Password dialog, click Yes.
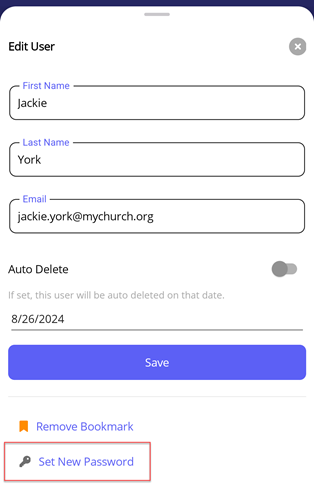
Select the Edit icon.

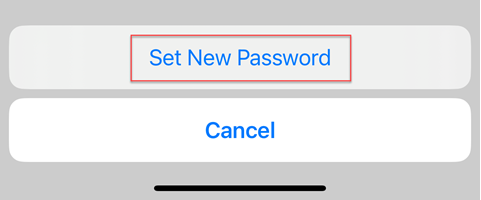
In the Edit User flyout, select Set New Password.
At the Confirm New Password dialog, select Yes.
Select the Options icon.
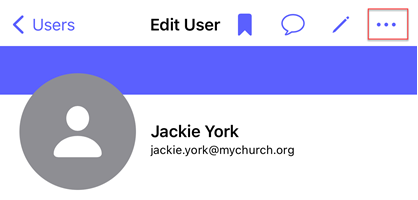
In the flyout, select Set New Password.
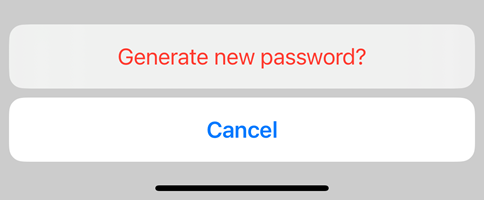
Select Generate new password? to confirm.
Send Message to User
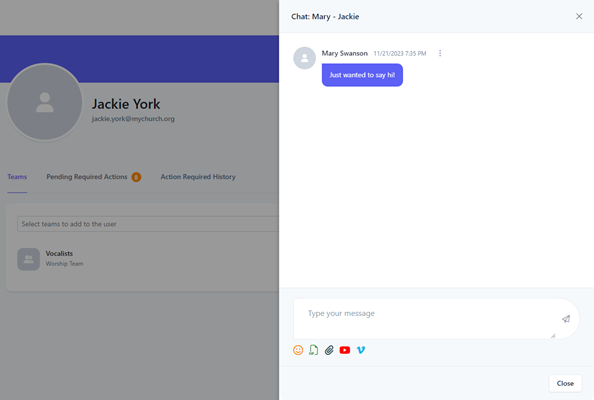
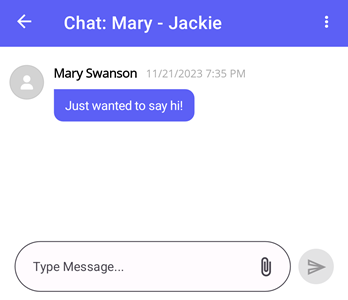
Huddle Monkey allows you to send a message to a user without having to specifically create a conversation with that user or navigate to the conversations page to view the conversation. When you send a direct message to a user, if a conversation does not already exist between you and the specific individual, a new conversation will automatically be created for you.
Click the Message button.

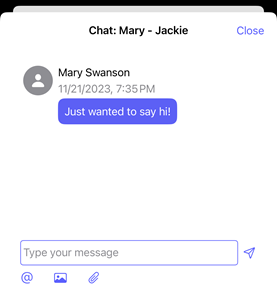
The conversation is created if needed and displayed in the flyout window, where you can then send a message to the user.
Select the Message icon.
The conversation is created if needed and you are directed to the conversation page, where you can then send a message to the user.
Select the Message icon.
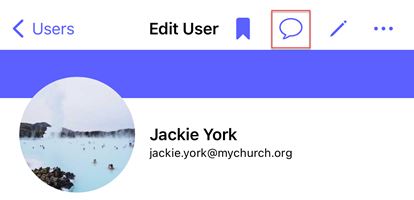
The conversation is created if needed and displayed in the flyout window, where you can then send a message to the user.
Bookmark User
Bookmarking a user allows you to easily navigate to the user from the global bookmarks.
Click the Bookmark button. Click again to delete the bookmark.

Select the Edit icon.

In the Edit User flyout, select Bookmark User. Select Remove Bookmark to delete the bookmark.
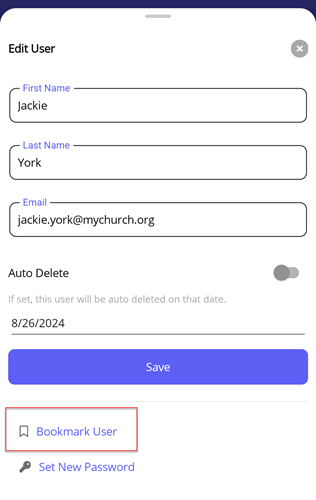
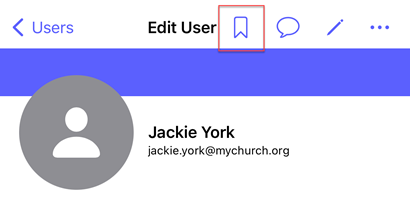
Select the Bookmark icon. Select again to delete the bookmark.
