Editing Teams
Editing a team will allow you to update the team name or description, move the team to a different parent team, update the team logo, update the welcome email, set the team as a container, and add users to the team.
Navigating to a Team
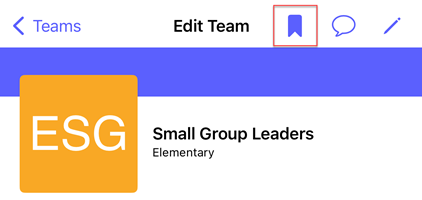
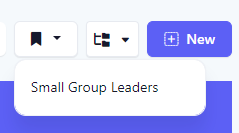
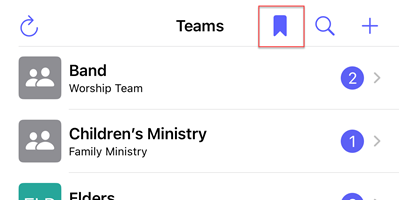
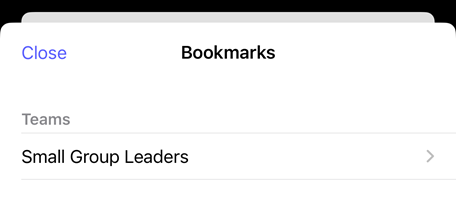
Navigate to a team through the Teams page or via a bookmark. Teams can be bookmarked so they can be accessed easily from global bookmarks or bookmarks on the Teams page.
Edit Team Name or Description
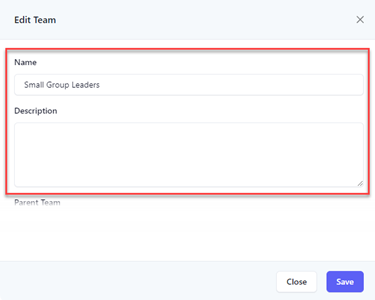
Click the Edit button.

At the Edit Team flyout, update the team name and/or description as necessary. Click the Save button to save the changes.
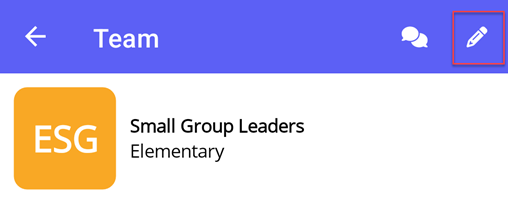
Select the Edit icon.
At the Edit Team flyout, update the team name and/or description as necessary. Select the Save button to save the changes.
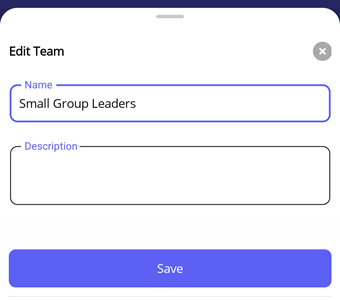
Select the Edit icon.
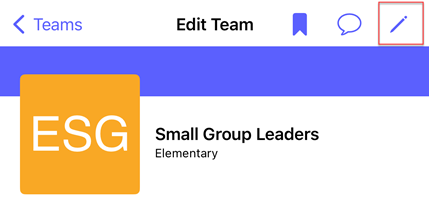
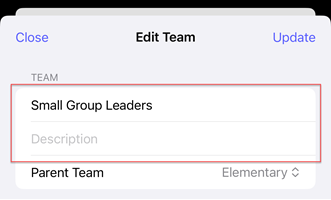
At the Edit Team flyout, update the team name and/or description as necessary. Select the Update button to save the changes.
Move Team to a New Parent
Teams are hierarchical in nature. A team can have another team as a parent or have no parent team, meaning that the team is at the root level of the team hierarchy.
Move with the Edit Team View
Click the Edit button.

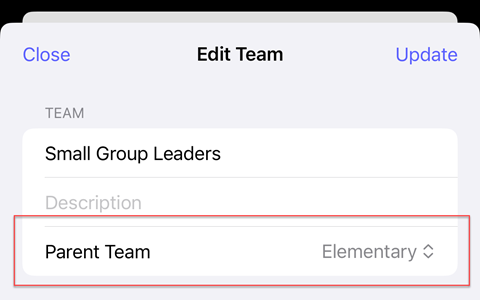
At the Edit Team flyout, select the parent team to move the team under. If you are the owner or an admin, you have the option to select None to move the team at the root of the hierarchy. Click the Save button to save the changes.
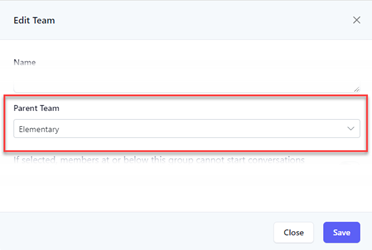
Select the Edit icon.

At the Edit Team flyout, select the parent team to move the team under. If you are the owner or an admin, you have the option to select None to move the team at the root of the hierarchy. Select the Save button to save the changes.
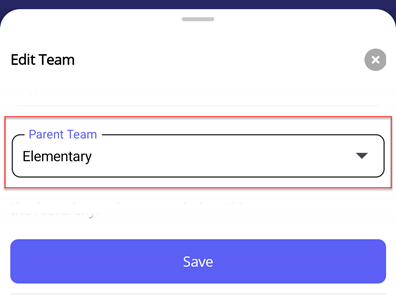
Select the Edit icon.

At the Edit Team flyout, select the parent team to move the team under. If you are the owner or an admin, you have the option to select None to move the team at the root of the hierarchy. Select the Update button to save the changes.
Drag and Drop in Tree
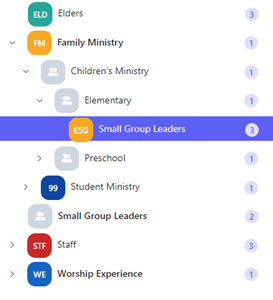
In the web browser, you can move a team by dragging it to a new team in the tree view. If you are the owner or admin, you can drag a team to the root level by dropping the team in the white space in between any other root level team.
Select the team you want to move in the tree and while holding down the mouse start to drag the team.
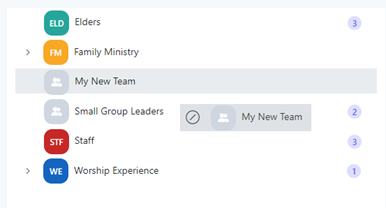
Drag the team over the team you would like to make the new parent team and release the mouse. In the example below, the new parent team is Staff.
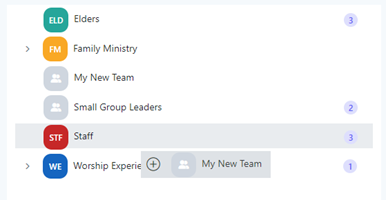
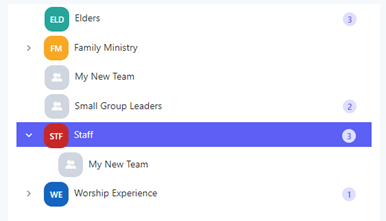
Upon success, the team will appear below its new parent.
Make a Team a Container
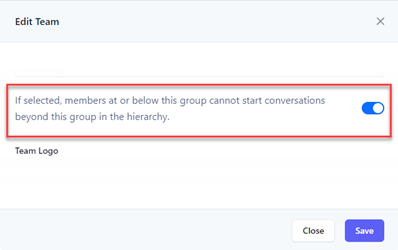
Containers allow you to define boundaries within your team structure. By default, any user can initiate a conversation with any team in the organization. If this is not the behavior you want, you can set a team as a container. A container indicates that the current team and all of its child teams are in a container. Users that are not the owner, admins, or team leaders cannot initiate a conversation outside of their container.
Edit Team View
Click the Edit button.

At the Edit Team flyout, toggle the switch to make the team a container. Click the Save button to save the changes.
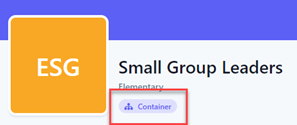
Upon success, the team will indicate that it is a container with the container badge as well as the team name highlighted in bold in the tree view.
Select the Edit icon.

At the Edit Team flyout, toggle the switch to make the team a container. Select the Save button to save the changes.
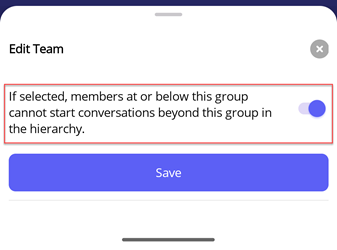
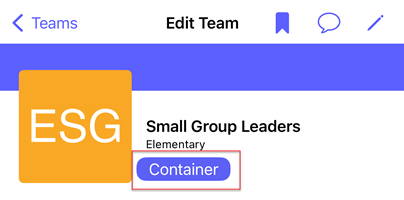
Upon success, the team will indicate that it is a container with the container badge.
Select the Edit icon.

At the Edit Team flyout, toggle the switch to make the team a container. Select the Update button to save the changes.
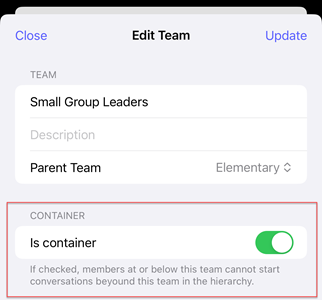
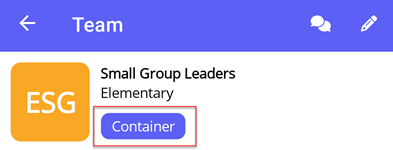
Upon success, the team will indicate that it is a container with the container badge.
Tree View
In the web browser, you can right click on the team in the tree view to select the container option from the context menu.
Right click the team you want to make a container in the tree view and select Toggle Container.

Upon success, the team will indicate that it is a container with the container badge as well as the team name highlighted in bold in the tree view.
Edit Team Logo
You can give each team a logo to distinguish them between teams or brand your teams. By default, teams are created with the default logo. A team can have one of the following for an logo:
- Graphic
- Logo with background and 3 character text
- Default team icon
If a graphic is set, that takes priority, then the logo with the background, then default team icon if a graphic or logo has not been defined.
Setting a Graphic as the Team Logo
Click the Edit button.

At the Edit Team flyout, click the Upload button.
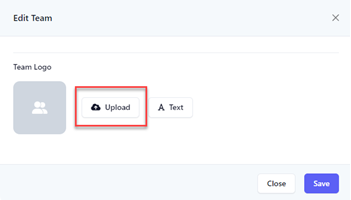
The view will change to allow you to upload a file. Click the Browse button, and at the file selection dialog box, select your desired image you want to set as the team logo. You can also drag and drop the desired file into the drop area.

Click the Upload button to upload that file for the team logo.
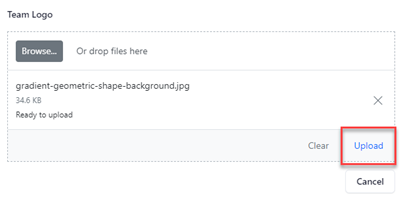
When the file has successfully been uploaded, the logo will now show for the team.

Select the Edit icon.
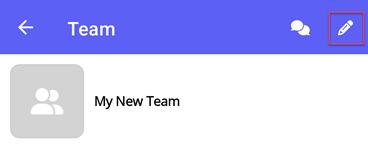
At the Edit Team flyout, select the Upload button and select the desired image from your device's gallery.
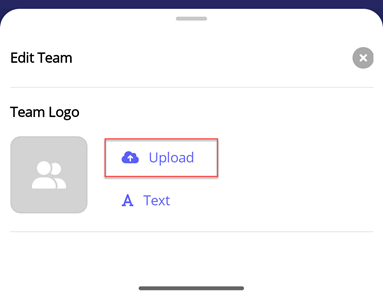
When the file has successfully been uploaded, the logo will now show for the team.
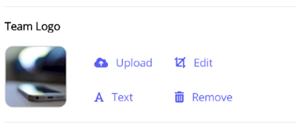
Select the Edit icon.
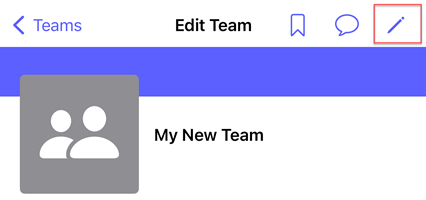
At the Edit Team flyout, select the Upload Image button and select the desired image from your device's gallery.
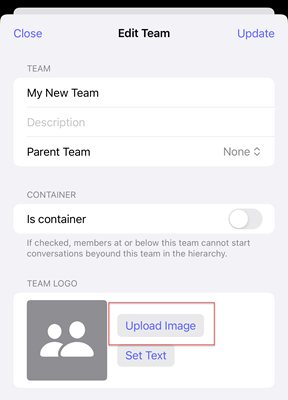
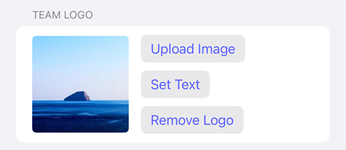
When the file has successfully been uploaded, the logo will now show for the team.
Editing an Existing Graphic
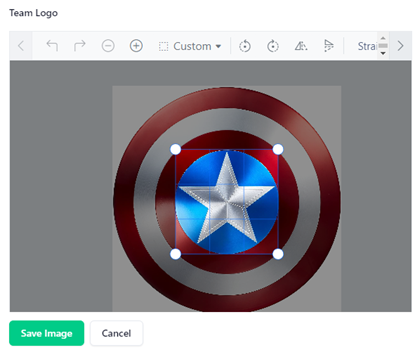
If the team already has a graphic logo, you can edit the logo by cropping, annotating, or applying filters to the graphic.
Click the Edit button.

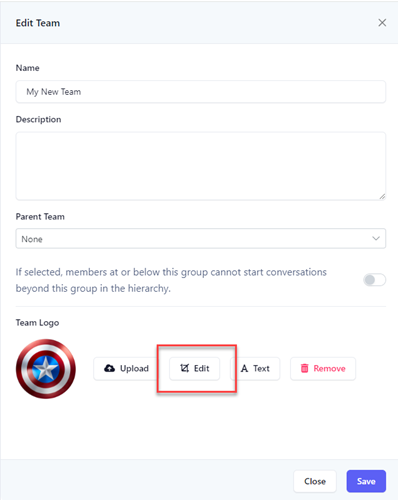
At the Edit Team flyout, click the Edit button.
The view will change to allow you to modify the graphic. Use the toolbar to adjust the image as necessary. Click the Save Image button to save the changes.
When the file has successfully been updated, the new logo will now show for the team.

Select the Edit button.
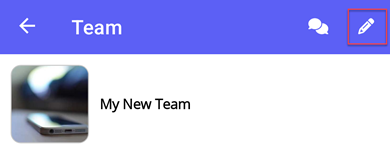
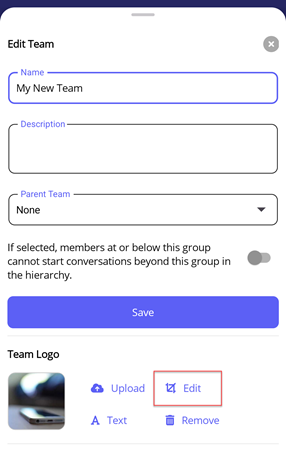
At the Edit Team flyout, select the Edit button.
The view will change to allow you to modify the graphic. Use the toolbar to adjust the image as necessary. Select the Save button to save the changes.
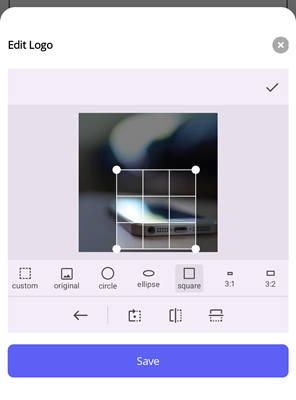
When the file has successfully been updated, the new logo will now show for the team.
Setting a Text Logo
A text logo allows you to define a background color and up to three characters to describe your team.
Click the Edit button.

At the Edit Team flyout, click the Text button.
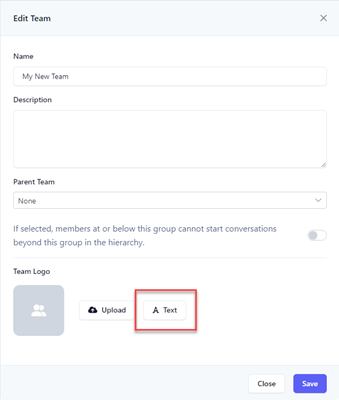
The view will change to allow you to set the text logo. Set the team text (up to 3 characters) using the Text field. Change the text color and background color of the logo by setting the Color and Background fields with the color section dropdown. Click the Set Text Logo button to save your changes.
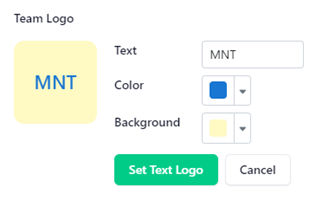
Upon success, the logo will now show for the team.

Select the Edit icon.

At the Edit Team flyout, select the Text button.
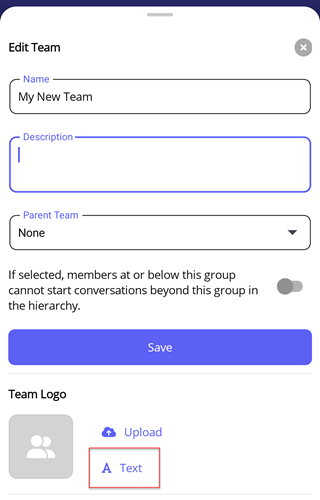
The view will change to allow you to set the text logo. Set the team text (up to 3 characters) using the Text field. Change the text color and background color of the logo by setting the Color and Background fields with the color section dropdown. Select the Save Text Logo button to save your changes.
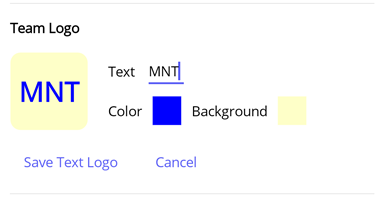
Upon success, the logo will now show for the team.
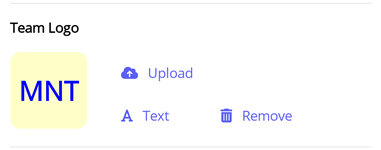
Select the Edit icon.

At the Edit Team flyout, select the Set Text button.
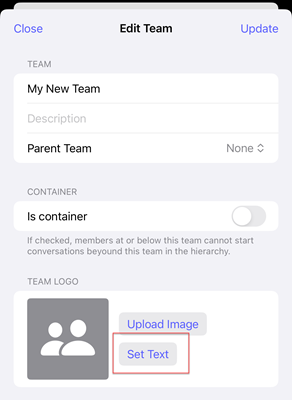
The view will change to allow you to set the text logo. Set the team text (up to 3 characters) using the Text field. Change the text color and background color of the logo by setting the Text Color and Background Color fields with the color section dropdown. Select the Update Logo button to save your changes.
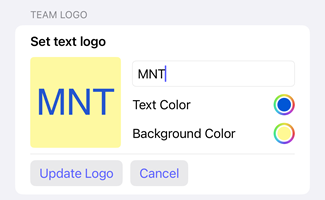
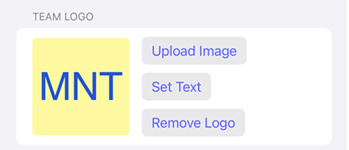
Upon success, the logo will now show for the team.
Removing the Logo
When you remove a team logo, either a graphic or text logo, the logo will revert back to the default team logo.
Click the Edit button.

At the Edit Team flyout, click the Edit button.

The view will change to allow you to modify the graphic. Use the toolbar to adjust the image as necessary. Click the Save Image button to save the changes.

When the file has successfully been updated, the new logo will now show for the team.

Select the Edit button.

At the Edit Team flyout, select the Edit button.

The view will change to allow you to modify the graphic. Use the toolbar to adjust the image as necessary. Select the Save button to save the changes.

When the file has successfully been updated, the new logo will now show for the team.
Select the Edit button.

At the Edit Team flyout, select the Edit button.

The view will change to allow you to modify the graphic. Use the toolbar to adjust the image as necessary. Select the Save button to save the changes.

When the file has successfully been updated, the new logo will now show for the team.
Team Members
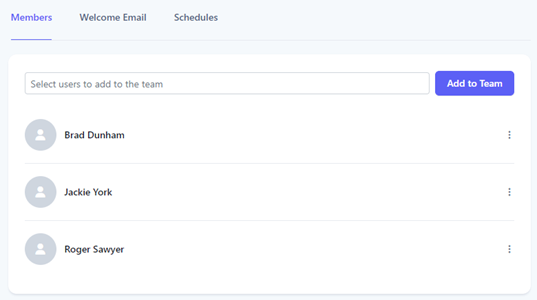
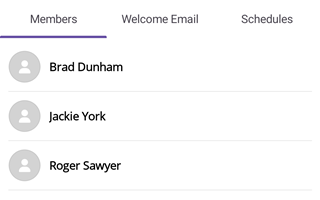
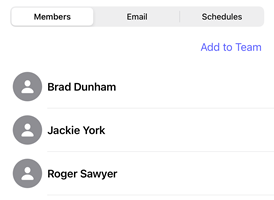
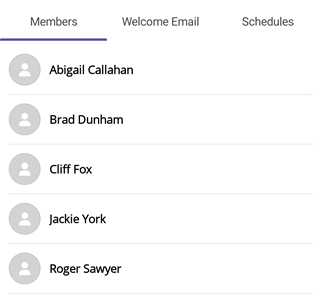
Teams can have one or more users as team members. Teams are used in Huddle Monkey to group users together and are used to invite teams into a conversation, announcements, and target scheduled content for viewing. You can assign one or more team leaders for each team. The team members, if any, are listed under the Members tab.
Add User to a Team
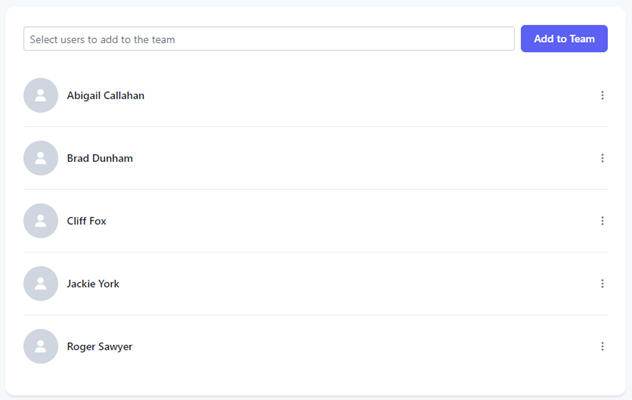
Select one or more users to add to the team from the dropdown list. You can either select a user directly from the list or search for users by entering any of the characters contained in the user’s name.
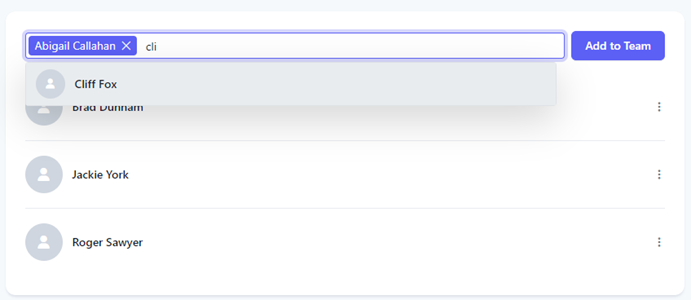
Once you have selected all the users to add for the team, click Add to Team.
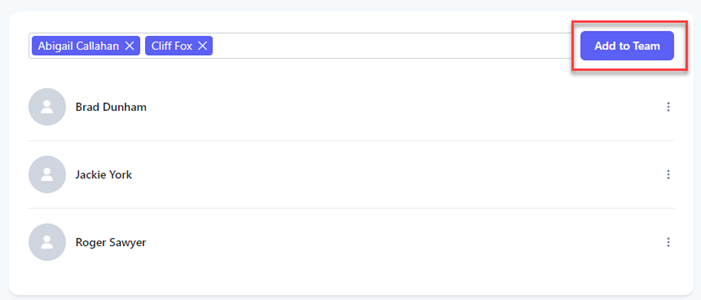
Upon success, the users are now listed and the users are notified they have been made a member of the team.
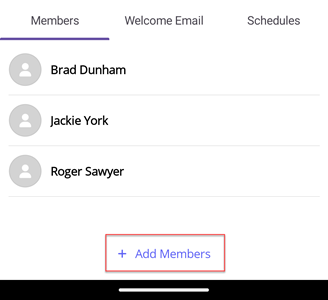
Select the Add Members button.
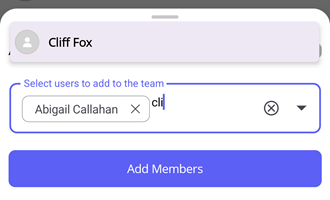
At the Add Team Members flyout, select one or more users to add to the team from the dropdown list. You can either select a user directly from the list or search for users by entering any of the characters contained in the user’s name.
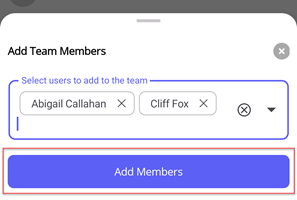
Once you have selected all the users to add for the team, select Add Members.
Upon success, the users are now listed and the users are notified they have been made a member of the team.
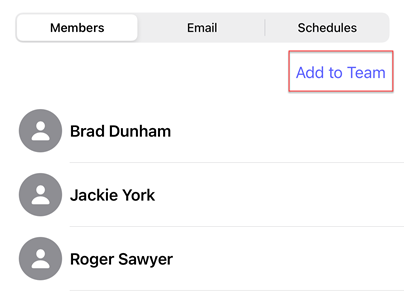
Select the Add to Team button.
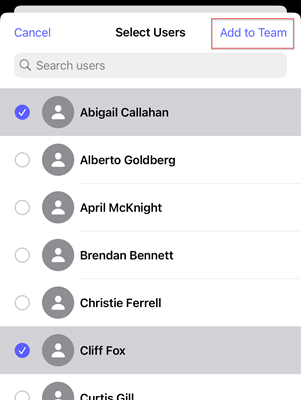
At the Select Users flyout, select one or more users to add. Once you have selected all the users to add for the team, selec Add to Team.
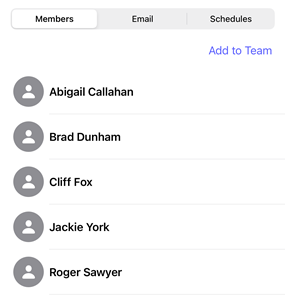
Upon success, the users are now listed and the users are notified they have been made a member of the team.
Remove User from Team
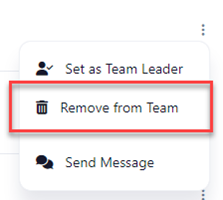
Click the vertical dots for the user you want to remove from the team.

At the dropdown menu, select Remove from Team.
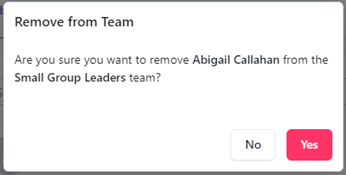
At the Remove from Team dialog box, click Yes.
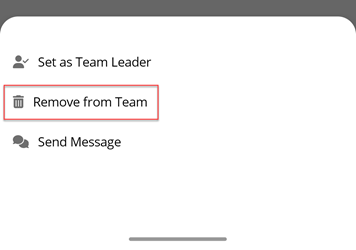
Select the user you want to remove from the team.

At the flyout, select Remove from Team.
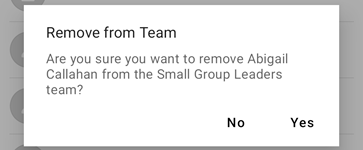
At the Remove from Team dialog box, select Yes.
Select the user you want to remove from the team.

At the flyout, select Remove from Team.
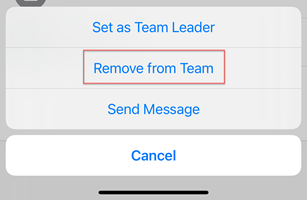
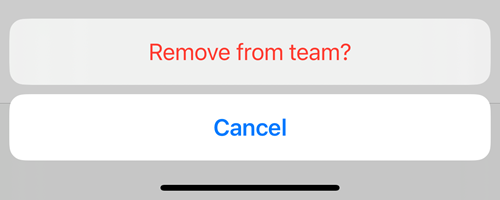
Select Remove from team? to confirm.
Make User a Team Leader
You can assign one or more team leaders for each team. A user assigned as a team leader has the following permissions in Huddle Monkey:
- Create modules and schedule them for any team they lead plus teams below them in the hierarchy
- Initiate a conversation with any team and/or user in the organization
- Create users and assign them to any team they lead plus teams below them in the hierarchy
- Create, edit, or delete teams below the team they lead in the hierarchy
Click the vertical dots for the user you want to set as a team leader.

At the dropdown menu, select Set as Team Leader.
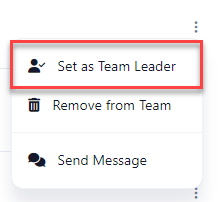
Upon success, the user is set as a team leader, as indicated by the Team Leader badge.

Select the user you want to set as a team leader.

At the flyout, select Set as Team Leader.
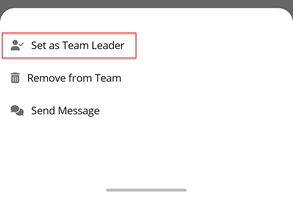
Upon success, the user is set as a team leader, as indicated by the Team Leader badge.

Select the user you want to set as a team leader.

At the flyout, select Set as Team Leader.
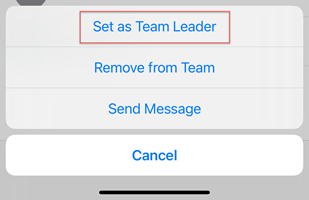
Upon success, the user is set as a team leader, as indicated by the Leader badge.

Remove User as Team Leader
Click the vertical dots for the user you want to remove as a team leader.

At the dropdown menu, select Remove as Team Leader.
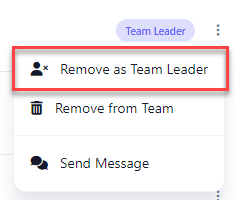
At the Remove as Team Leader dialog box, click Yes.
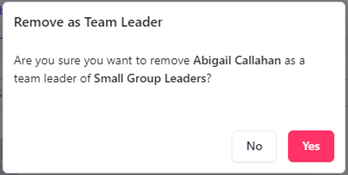
Select the user you want to remove as a team leader.

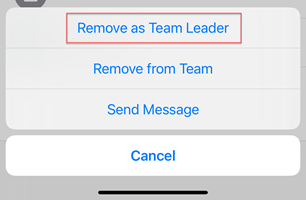
At the flyout, select Remove as Team Leader.
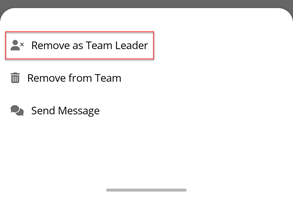
At the Remove as Team Leader dialog box, select Yes.
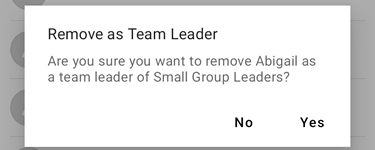
Select the user you want to remove as a team leader.

At the flyout, select Remove as Team Leader.
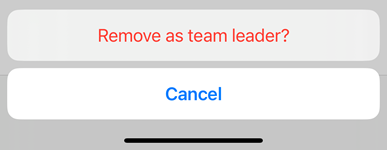
Select Remove as team leader? to confirm.
Send Message to Team Member
Huddle Monkey allows you to send a message to a user without having to specifically create a conversation with that user or navigate to the conversations page to view the conversation. When you send a direct message to a user, if a conversation does not already exist between you and the specific individual, a new conversation will automatically be created for you.
Click the vertical dots for the user you want to send the message to.

At the dropdown menu, select Send Message. The conversation is created if needed and displayed in the flyout window, where you can then send a message to the user.
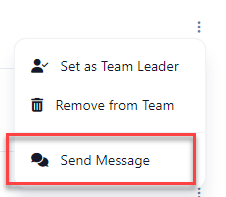
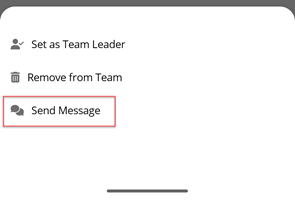
Select the user you want to send the message to.

At the flyout, select Send Message. The conversation is created if needed and displayed in the flyout window, where you can then send a message to the user.
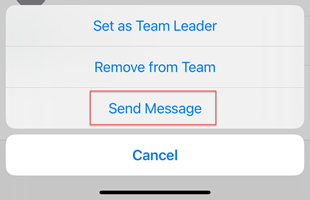
Select the user you want to send the message to.

At the flyout, select Send Message. The conversation is created if needed and displayed in the flyout window, where you can then send a message to the user.
Update Welcome Email
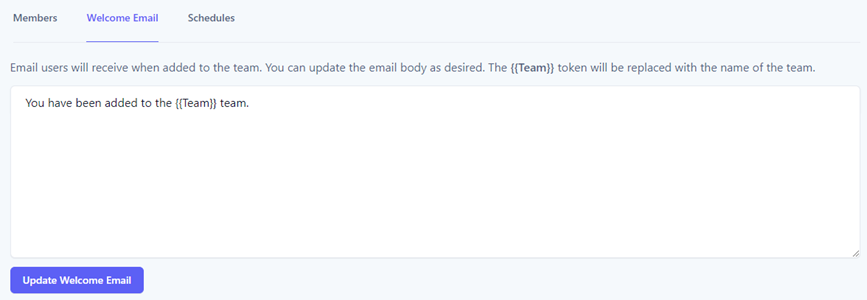
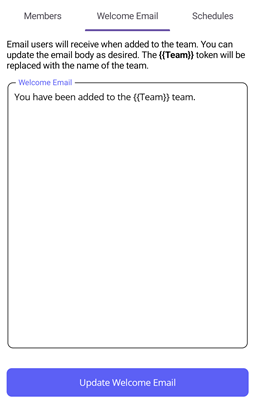
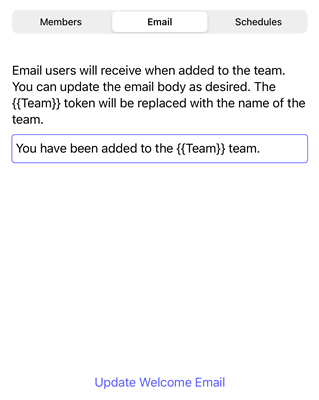
When a user is added to a team, they are sent a welcome email to let them know they have been made a member of the team. A default email is set for each team, but you can change the email body as desired. The welcome email is found under the Welcome Email tab.
You can update the welcome email as necessary. The token {{Team}} will be replaced with the name of the team in the email, though you don’t have to include the {{Team}} token in the email. You can always revert back to the default email by clearing all the text and saving. Make the desired changes and select the Update Welcome Email button.
View Team Schedules
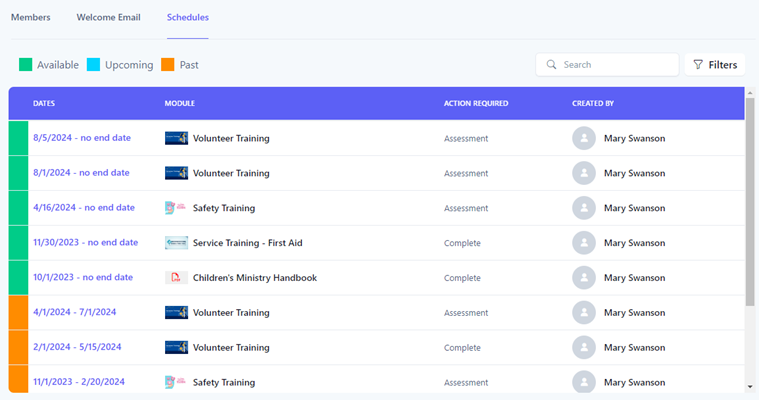
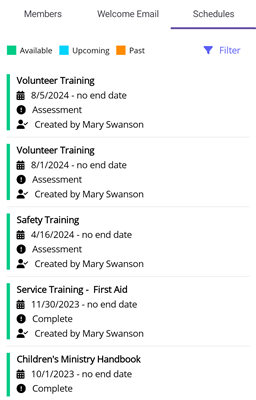
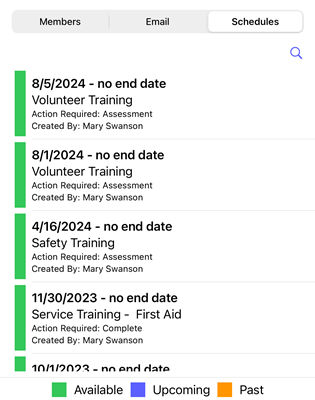
The Schedules tab will list all schedules that have been associated with the team. All schedules assigned to the team will show, even if someone else created them.
Filtering Schedules
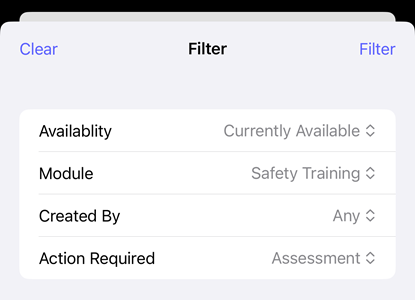
You can further refine the list of schedules by searching based on the desired search criteria. Using the filter panel, you can select one or more search criteria. The table below describes the different types of search criteria.
| Search Criteria | Description |
|---|---|
| Availability |
Search based on the availability of the schedule.
Currently Available - Schedule is currently available for the user to view
Upcoming - Schedule is not yet available
Past - Schedule is no longer available for the user to view
|
| Modules | Search based on the modules that have been scheduled. |
| Action Required |
Search based on the required action.
None - No action is required of the user
Complete - User must complete the content
Assessment - User must complete the content and take an assessment
|
| Created By | Search based on who created the schedule. |
You can search using a simple search or using the filter panel for a more refined search. To perform a simple search, enter the desired search criteria into the Search box. This will dynamically update the list of schedules with those whose schedule dates, module, action required, or the created by name contain the text entered in the search box.

For a more refined search, click the Filters button to reveal the filter panel.

In the Filter Schedules panel, select your search criteria and click the Filter button. Click the Clear button to clear all filters.
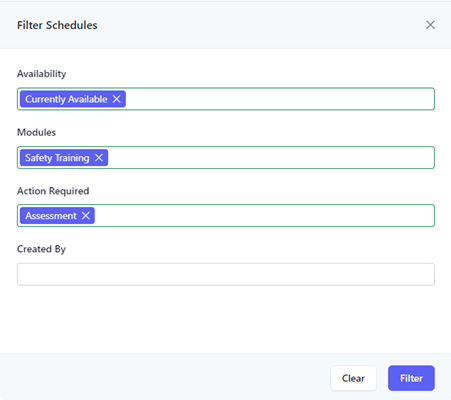
The results of the filter are then shown in the table. When a filter is set, the number of filters applied will appear next to the text in the Filters button.

Select the Filter button to reveal the filter panel.
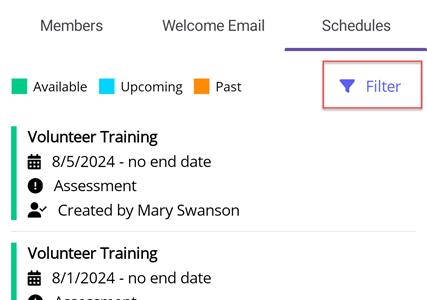
In the Filter Schedules panel, select your search criteria and select the Filter button. Select the Clear button to clear all filters.
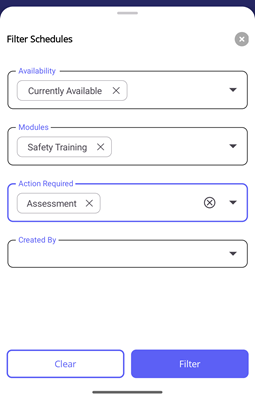
The results of the filter are then shown in the list. When a filter is set, an orange bar is displayed at the top indicating how many filters have been set. You can clear the filters from the bar by tapping the Clear link.
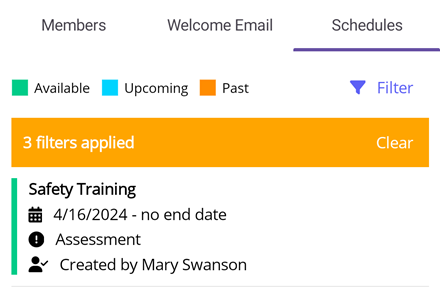
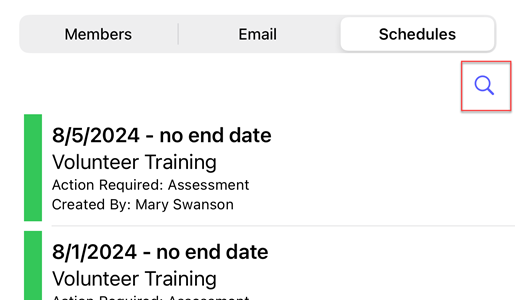
Select the Filter icon to reveal the filter panel.
In the Filter panel, select your search criteria and select the Filter button. Select the Clear button to clear all filters.
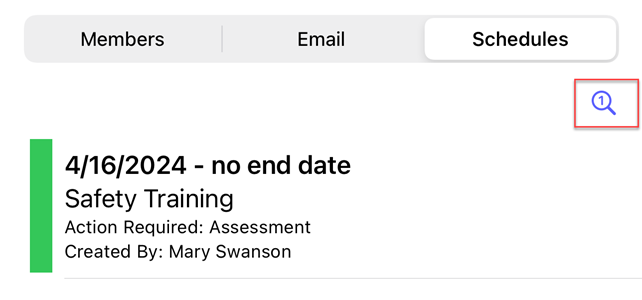
The results of the filter are then shown in the list. When a filter is set, the Filter icon is changed to indicate a filter has been applied.
Send Message to Team
Huddle Monkey allows you to send a message to a team without having to specifically create a conversation with that team or navigate to the conversations page to view the conversation. When you send a direct message to a team, if a conversation does not already exist between you and the specific team, a new conversation will automatically be created for you.
Click the Message button.

The conversation is created if needed and displayed in the flyout window, where you can then send a message to the team.
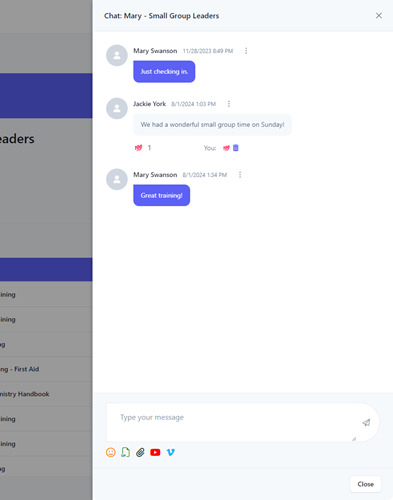
Select the Message icon.
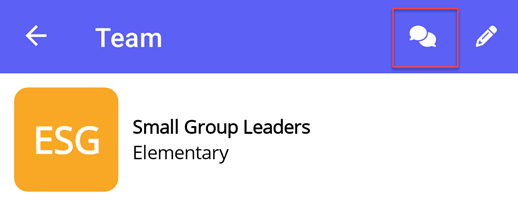
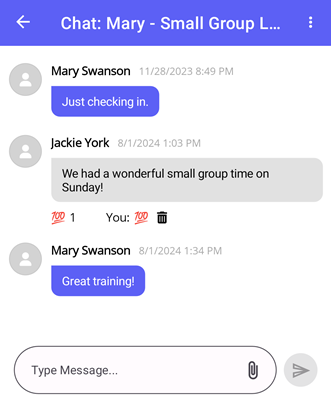
The conversation is created if needed and you are directed to the conversation page, where you can then send a message to the team.
Select the Message icon.
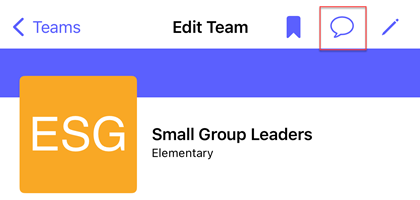
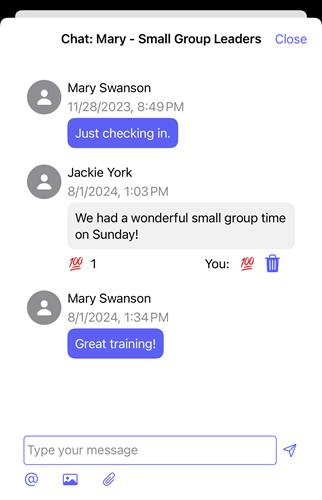
The conversation is created if needed and displayed in the flyout window, where you can then send a message to the team.
Bookmark Team
Bookmarking a team allows you to easily navigate to the team from the global bookmarks.
Click the Bookmark button. Click again to delete the bookmark.

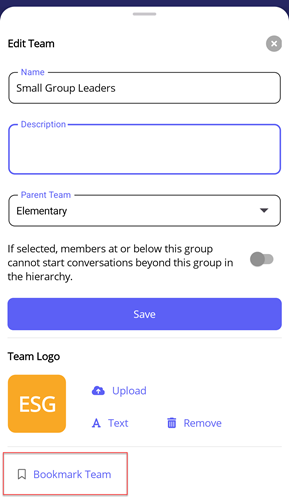
Select the Edit icon.

In the Edit Team flyout, select Bookmark Team. Select Remove Bookmark to delete the bookmark.
Select the Bookmark icon. Select again to delete the bookmark.
