How do I view and manage the schedules for a module?
This article will walk you through how to view and manage the schedules for a module, to include creating a new schedule, editing, and deleting a schedule. This functionality can also be done from the Schedules page. This view allows the advantage of only focusing on schedules for this module.
You must be the owner, an admin, or a team leader to edit a module.
-
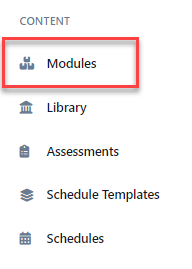
Under the Content heading in the left hand side menu, click Modules.
-
Find the module you want to edit. Selecting the module card or the edit button in the table view will display it in edit mode.
-
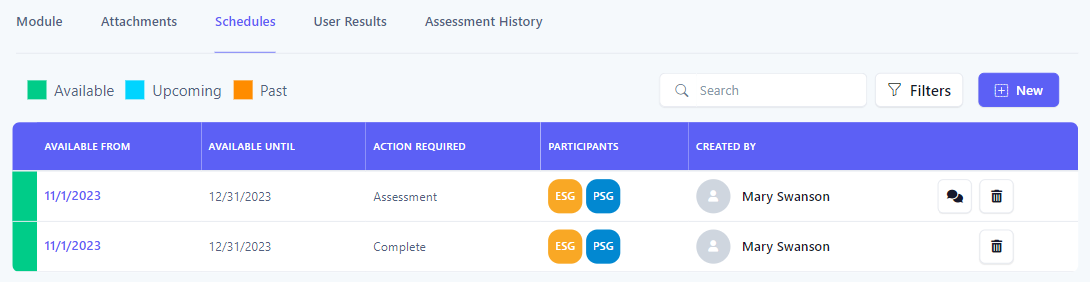
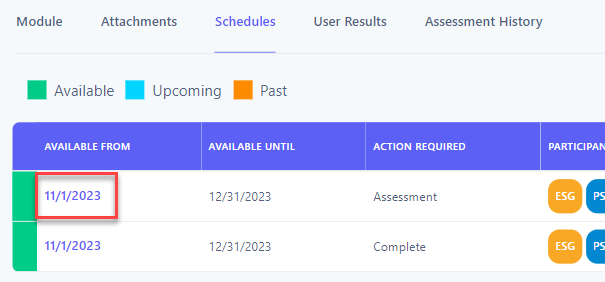
The Schedules tab lists all schedules, current, past, and present, associated with this module.
-
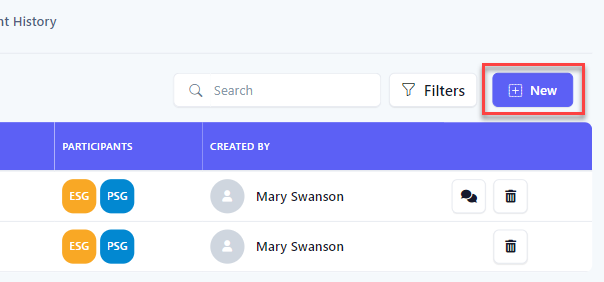
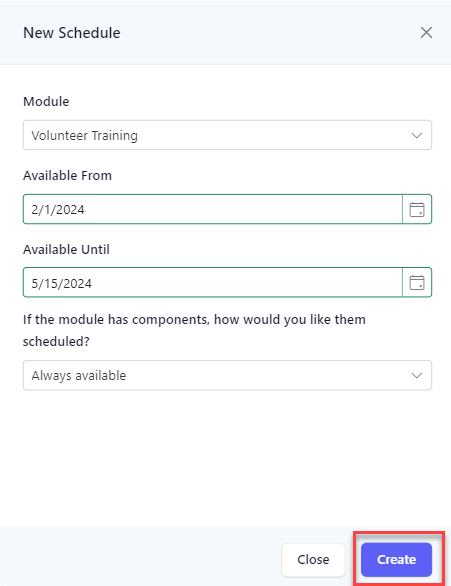
Adding a ScheduleClick the New button to add a new schedule for this module.
-
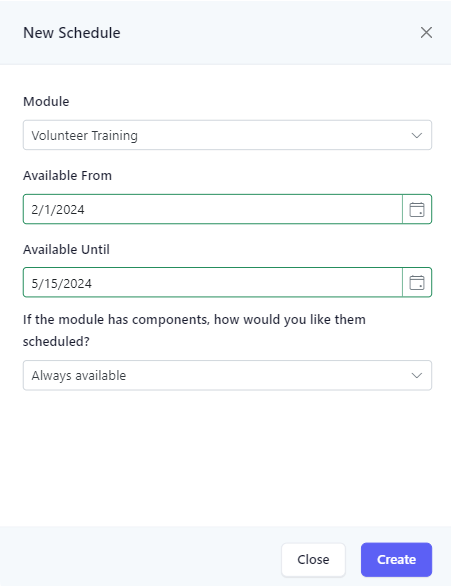
At the New Schedule flyout, select the dates for the schedule using the Available From and Available Until text boxes. You can set the schedule so it is currently available or set it to be available in the future. Leave the Available Until date empty to set the content to always be available.
-
If the module you are scheduling has child components, you can set how the child components are scheduled using the If the module has components, how would you like them scheduled? dropdown. There are several default options available. You can also create templates for each module that will show up in the list as well.
Option Description Always available All child components will have their available from dates set to the same available from date as the main schedule. Daily The first child component will start on the same date as the schedule's start date. Each child component that comes next will start one day after the previous component. Weekly The first child component will start on the same date as the schedule's start date. Each child component that comes next will start one week after the previous component. Every other week The first child component will start on the same date as the schedule's start date. Each child component that comes next will start every other week after the previous component. Monthly The first child component will start on the same date as the schedule's start date. Each child component that comes next will start one month after the previous component. Custom The child components will follow the description of the schedule template created for the module. 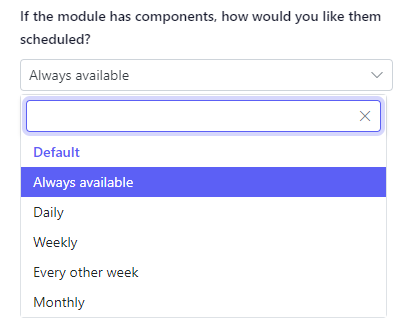
-
Click the Create button to create the new schedule. Upon success, you will be redirected to the edit schedule page. Refer to the related articles below on how to edit a schedule.
-
Editing a ScheduleClick the link under the Available From column of the schedule you would like to edit. You will be re-directed to the edit schedule page. Refer to the related articles below on how to edit a schedule.
-
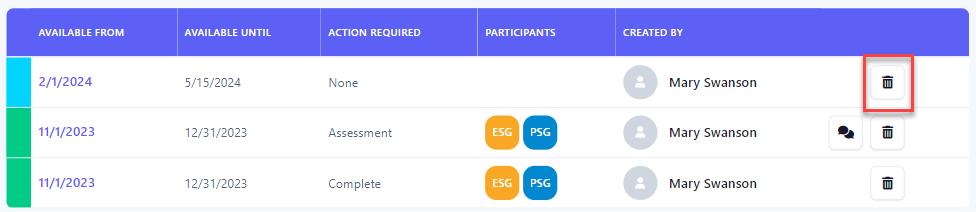
Deleting a ScheduleClick the delete button of the schedule to delete.
-
At the Confirm Delete dialog, select Yes
 Upon success, the schedule is deleted.
 Searching SchedulesTo search the schedules for the module, you can enter search criteria into the Search box, which will do a text search across the schedules, or for a more refined search, click the Filters button to reveal the filter panel.
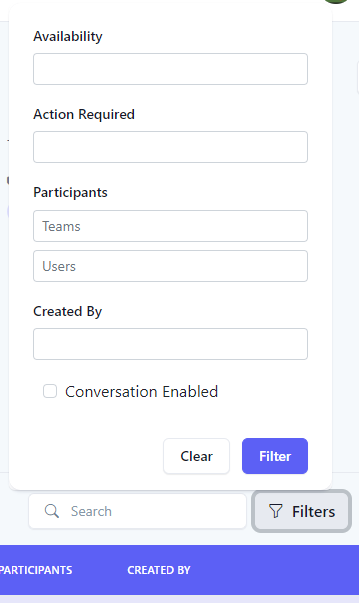 In the Filter Panel, select your search criteria and click the Filter button. Click the Clear button to clear all filters.
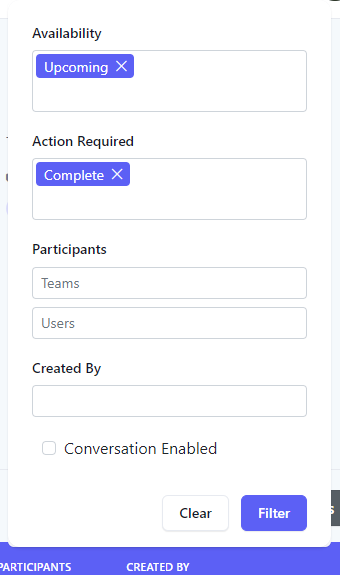 The results of the filter are then shown below. When a filter is set, the number of filters applied will appear next to the text in the Filters button.
 Viewing the ConversationIf a schedule has a conversation enabled, click the chat button to view the conversation in chat mode.
Related articles
- How do I see who has completed the required actions for a module?
- How do I see the assessment history for a module?
- How do I view the current module library?
- How do I view what modules are scheduled?
- How do I edit the dates of an existing schedule?
- How do I add/invite participants and/or remove participants from a schedule?
- How do I enable a conversation for an existing schedule?
- How do I set a required action for a schedule?
- How do I create a schedule template?